These options make faster-paced classes more doable.

(Image: Andrew Clark; Canva design by Laura Harrold)
Posted on May 6, 2026 at 04:23 pm
You’re in Upward-Facing Dog, and what happens next is unclear. The instructor signals Downward Dog, so you press your hands into the mat and lift your hips, but then you hit the same roadblock you encounter time and time again — that rough maneuvering of your feet. In some way, you’re supposed to go from pressing on the tops of your feet with your toes pointing back to flexing your toes and pointing your toes forward. So you stumble along your way, not quite sure if you’re doing it “right,” but need to find some way to get to Down Dog.
There isn’t usually a lot of time in a vinyasa class to explore different ways of moving through this difficult-to-love moment. Just understanding how to roll on your toes can make this difficult part of flow more doable. There are alternative transitions between the two positions that are less physically challenging. Taking some time to explore them can also help you get out of autopilot and make this part of the class feel more fun and rewarding.
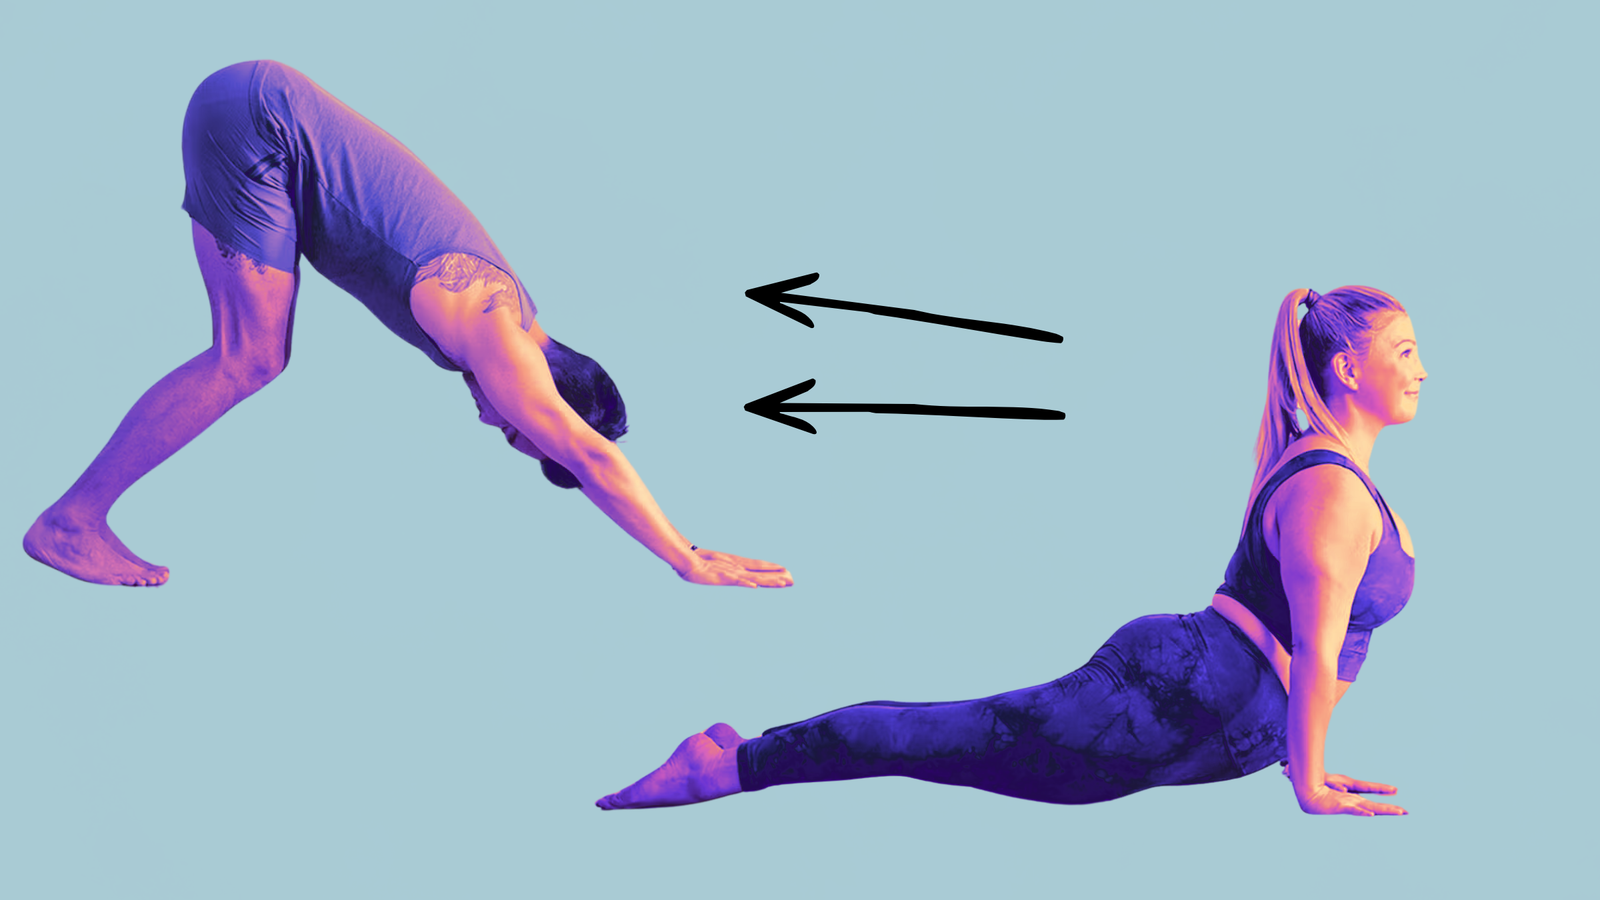
4 ways to move from up dog to down dog
Practice any of these upward-facing dog and downward-facing dog transitions during class or try them at home. If you are training alone, warm up to Upward Facing Dog by moving around cat–cow, Cobra, puppyor other less intense backbends.
As you move through these transitions, don’t be afraid to slow down so you can notice what’s most supportive (even if it means you miss some of the following poses during class).
1. Lower your knees on the mat
Placing your knees between Upward Dog and Downward Dog takes the weight off your hands and arms, giving them a short break. It also takes weight off your feet and helps you avoid a tip-over motion. Slide a blanket under your knees for extra support.
How to: Come in Upward-facing dog. Slowly lower your knees to the mat, flex your toes, and bring them closer to your hands and knees. Press through your hands and lift your hips inward Downward facing dog. Extend your legs as much as feels comfortable, bringing your heels toward the floor.
2. Roll with one foot at a time
This transition often feels easier for students than rolling on both sets of toes at once. However, it is also asymmetric. If you are practicing rolling on the toes of one foot at a time, it is helpful to change which foot you roll on first so that you can… I feel more “even”.
How to: From Upward Facing Dog, keep pressing your hands into the mat. Lift your hips while pressing into the tops of both feet. As you continue to raise your hips, roll onto the toes of one foot, flex your toes, and press the ball of that foot into the mat. Transfer some weight to it, then do the same with the opposite foot. Distribute your weight between both feet as you continue to move into Downward Dog.
3. Roll on both feet at the same time
This option may be especially difficult if your feet are cramped. You may also feel it in your arms and body, where they need to work extra to take the weight off your feet. It may be helpful to first move your feet and ankles (try… Toe squat Or point and bend your feet over the belt).
You want to prevent one or both heels from shifting to the sides as you roll your toes; Practice at home by hugging a block between your ankles to keep your feet parallel to each other. This in turn creates durability throughout the transition period.
How to: From Upward Facing Dog, press your hands into the mat, lift your hips, and roll on both sets of toes at the same time. Imagine your ankles turning toward each other to keep your heels from spreading out to the sides. You may need to take a few steps forward if there is a large distance between your hands and feet. Lower both heels toward the mat in a downward-facing dog position.
4. Keep your toes tucked in Upward-Facing Dog
What if you don’t point your toes back in Upward-Facing Dog? You always have the option of keeping your toes extended Wave To downward facing dog. The biggest upside is the smoother transition without requiring fancy footwork.
However, tucking your toes into Upward Dog raises the legs higher, which can cause the lower back to arch more and can be uncomfortable. You can reduce the severity of the backbend by not lowering your pelvis toward the mat completely. You can also keep your elbows slightly bent in Up Dog, a variation that requires and builds arm strength.
How to: from ChaturangaKeep your toes tucked when you get into upward-facing dog. Continue to keep them tucked as you press your hands and feet into the mat and lift your hips into Downward Facing Dog.
Playing with these options opens the door to making your practice smoother, and teaches you how to pay attention to those other overlooked moments on the mat and in life. What else doesn’t suit you? How can you make adjustments so they do?