
Posted on April 14, 2026 at 05:26 AM
Concluding the work day doesn’t always bring the rest you want. Some days you find yourself feeling tired and exhausted with a body in pain and a mind that feels completely stressed. At such times, practicing yin yoga poses can help you relax.
Yin Yoga is an effective antidote to the desk effect by encouraging your body to stretch, lengthen and release from a perpetual hunched position. As you relieve tired bodies from physical tension and racing minds from emotional stress, you’ll be setting yourself up for a truly restful evening—and a better night’s sleep.
Spend some in one, a few, or all of these yin yoga poses to restore your body, mind, and spirit, especially on the most stressful days.
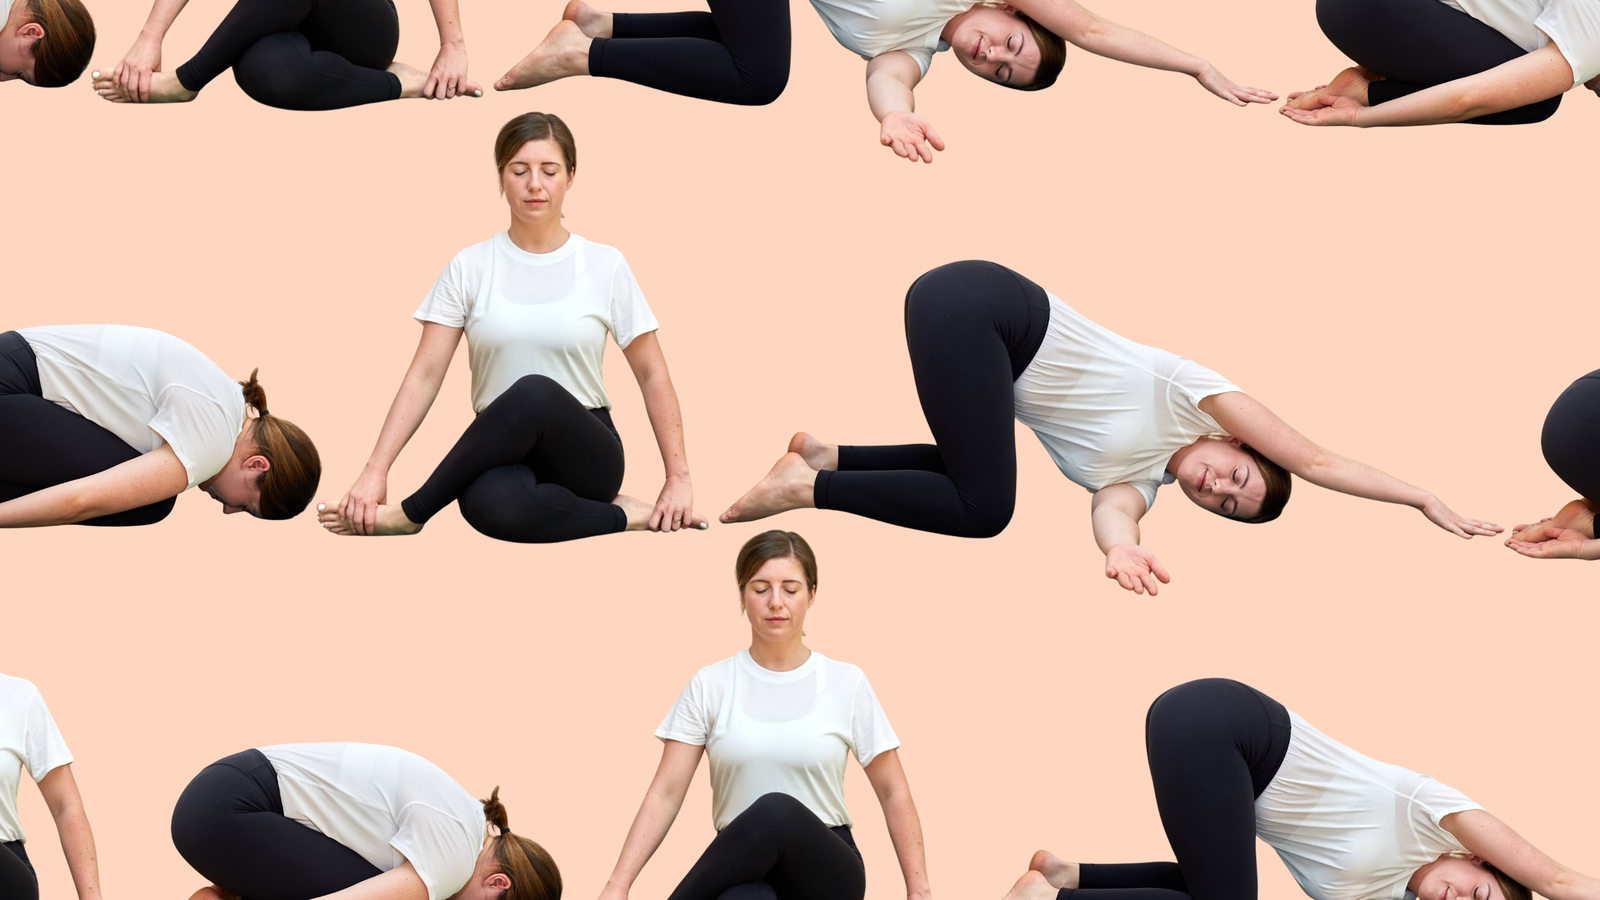
8 yin yoga poses to help you relax after work
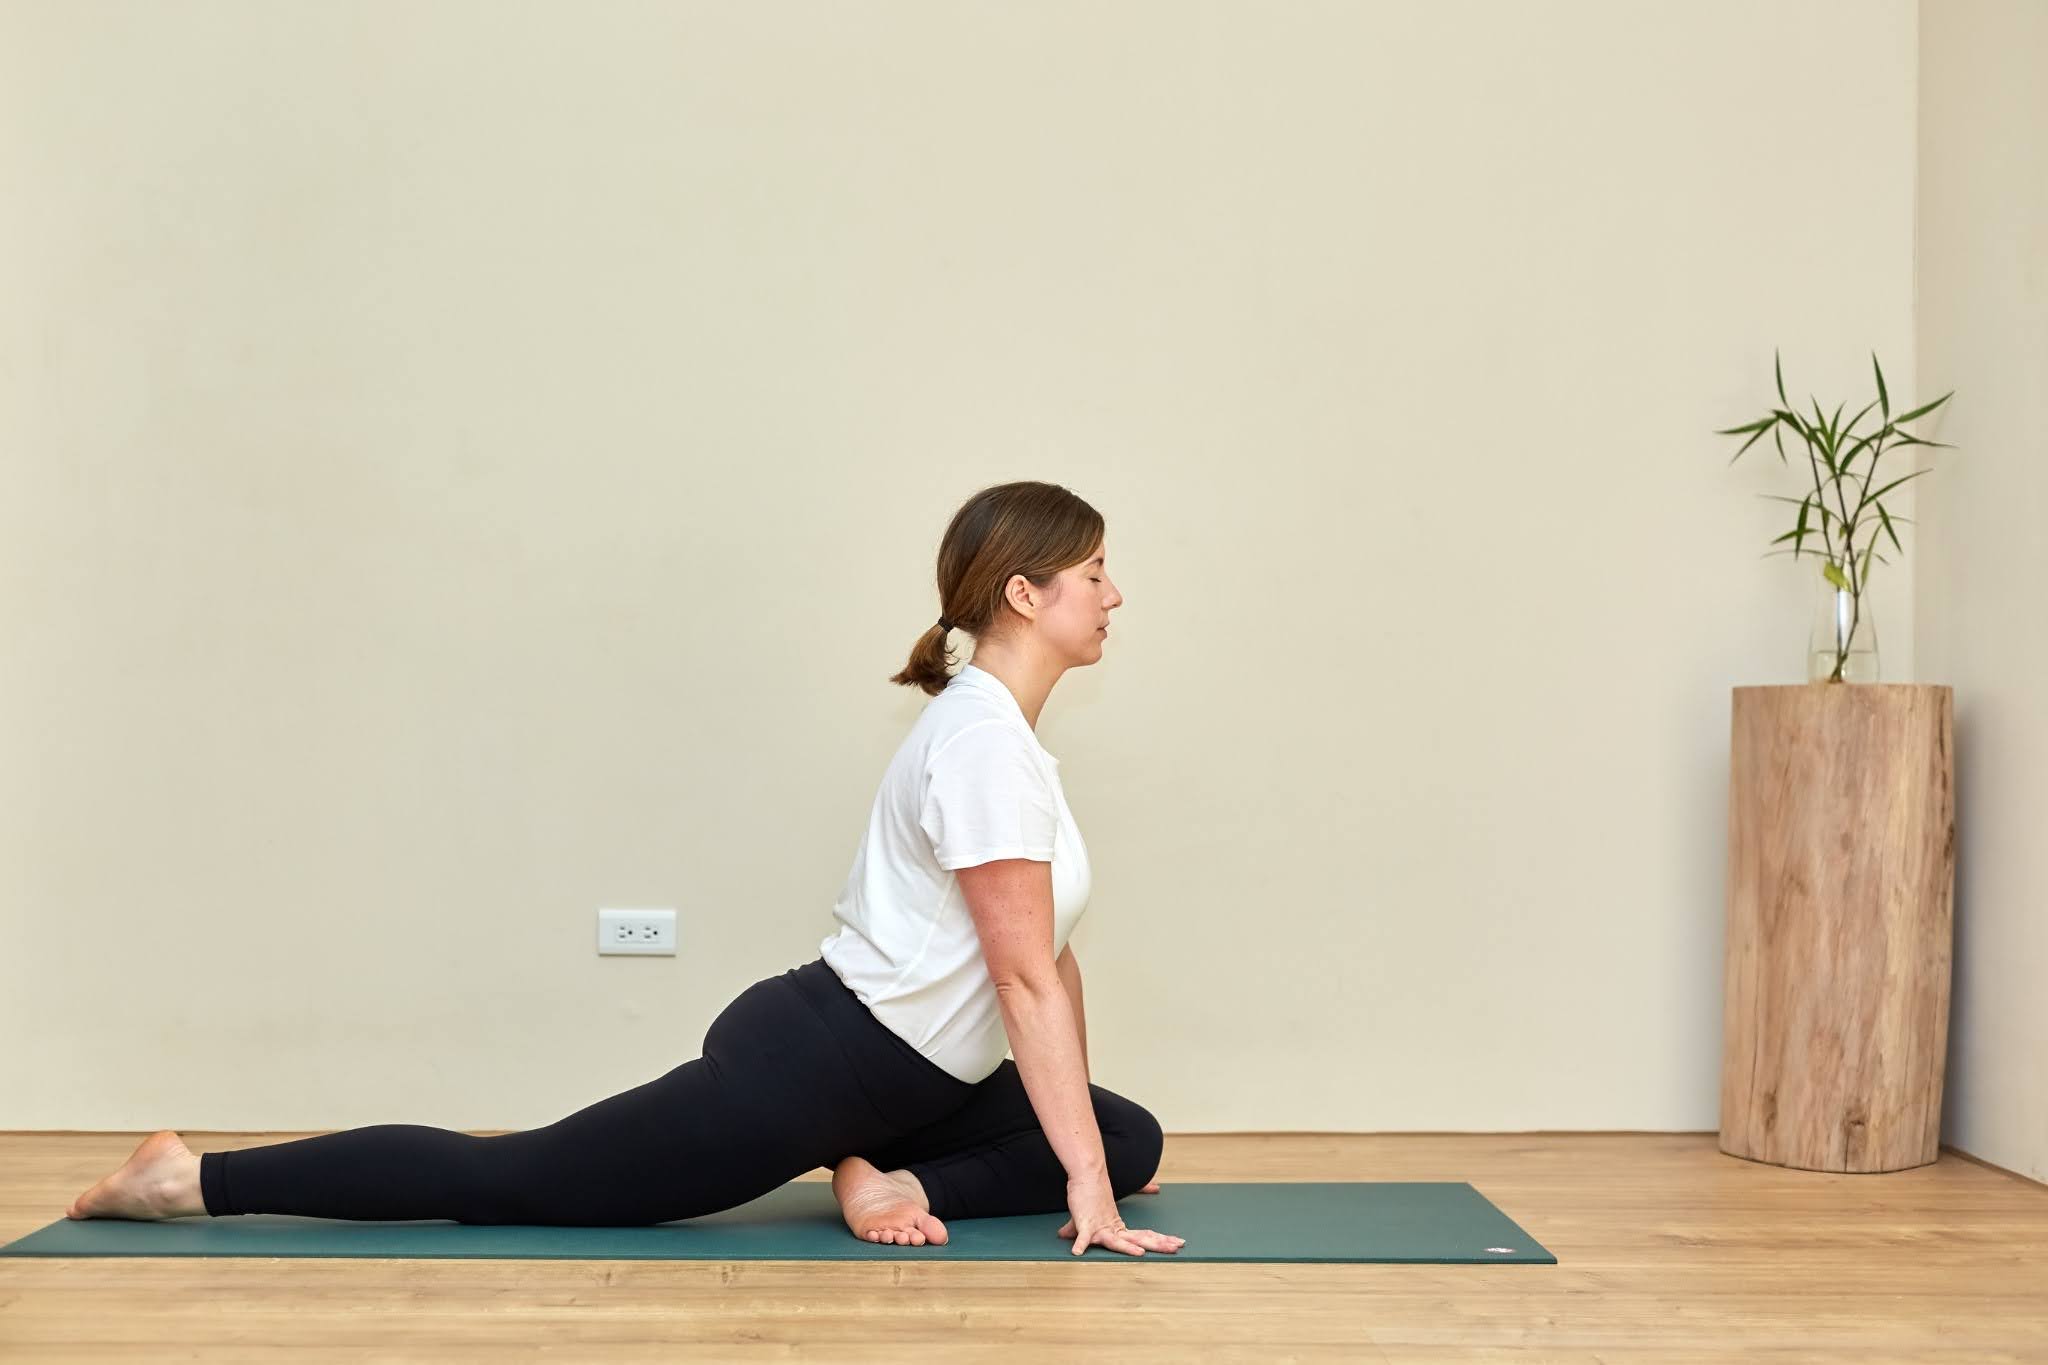
Grab a block (or block-like support, like a pillow or stack of books), a folded blanket, and a belt for extra support in these extended stands. Each yin yoga pose should be held for at least 3-5 minutes, but always listen to your body and respect its limits.
1. Child’s position
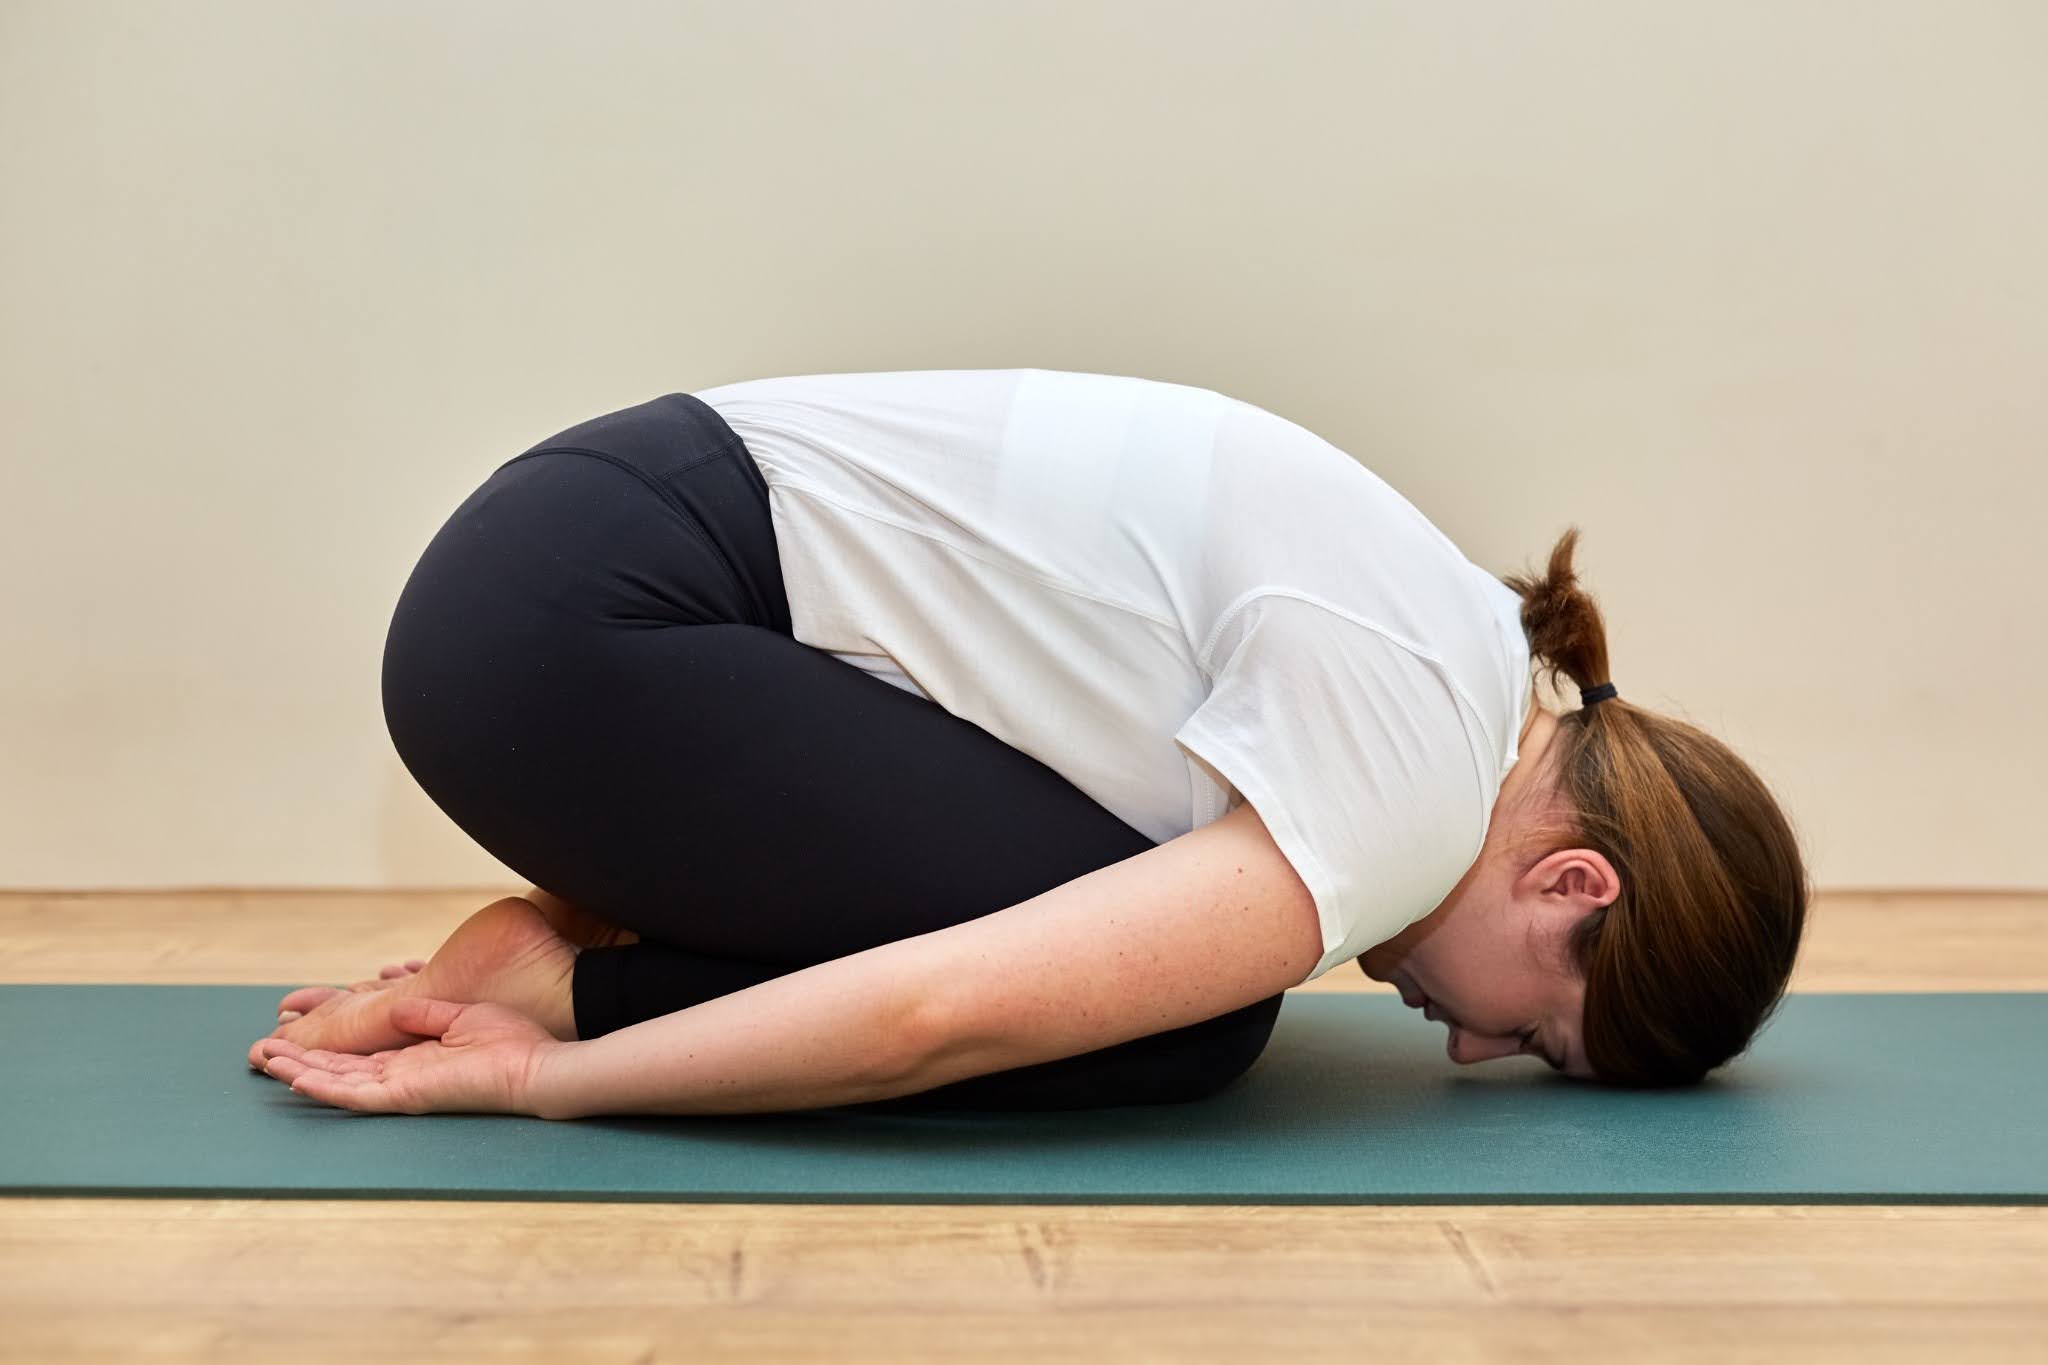
Child’s position It can help open the hips, relieve pressure on the lower back, and increase the length of the spine. It can also calm the mind by directing your focus inward toward your body and breath.
How to: Come to your hands and knees, bring your big toes together, then lower your hips toward your heels. Target the lower back by keeping your knees close together; Focus on opening your hips by keeping your knees hip width apart. If your hips don’t reach your heels, you can instead sit on a block or pillow. Place your forehead on the mat, block, or stacked fists. Let your arms relax beside your body, with your palms facing up.
Focus on feeling your breath going in and out of your body. Take advantage of the sensation you feel in your back and hips. It’s normal for your mind to drift during these pauses; If this happens, return to focusing on your breath.
Alternate mode: Lie on your back and hug your knees toward your chest. It’s basically the same shape and will still relieve pressure on your lower back.
Stay in your chosen form of Child’s Pose for 2-5 minutes or as long as you want. When you’re ready, slowly make your way to a comfortable seat. Stay seated on your mat for a few breaths.
2. Swan pose
Swan Pose (various yin yoga poses). Dove pose) opens the hips, stretches the buttocks, lengthens the spine, and relaxes the quadriceps, all while providing you with an opportunity to retreat into yourself.
How to: Return to your hands and knees and bring your right knee in front of you on the mat. Wherever you land comfortably is fine; Don’t worry about alignment or angles. Try to position your hips toward the front of the mat and avoid collapsing or rolling onto your right hip, if possible. Prop a block or pillow under your right hip for support if needed.
Stay here or bend forward over bent knee, drop onto your forearms or rest your forehead on the mat, stacked hands, or block.
Stay in your chosen position for 2-5 minutes or as long as you want. When you are ready, slowly return to a comfortable seat. Pause here for a moment before you repeat Swan on the other side.
3. Shoelace position
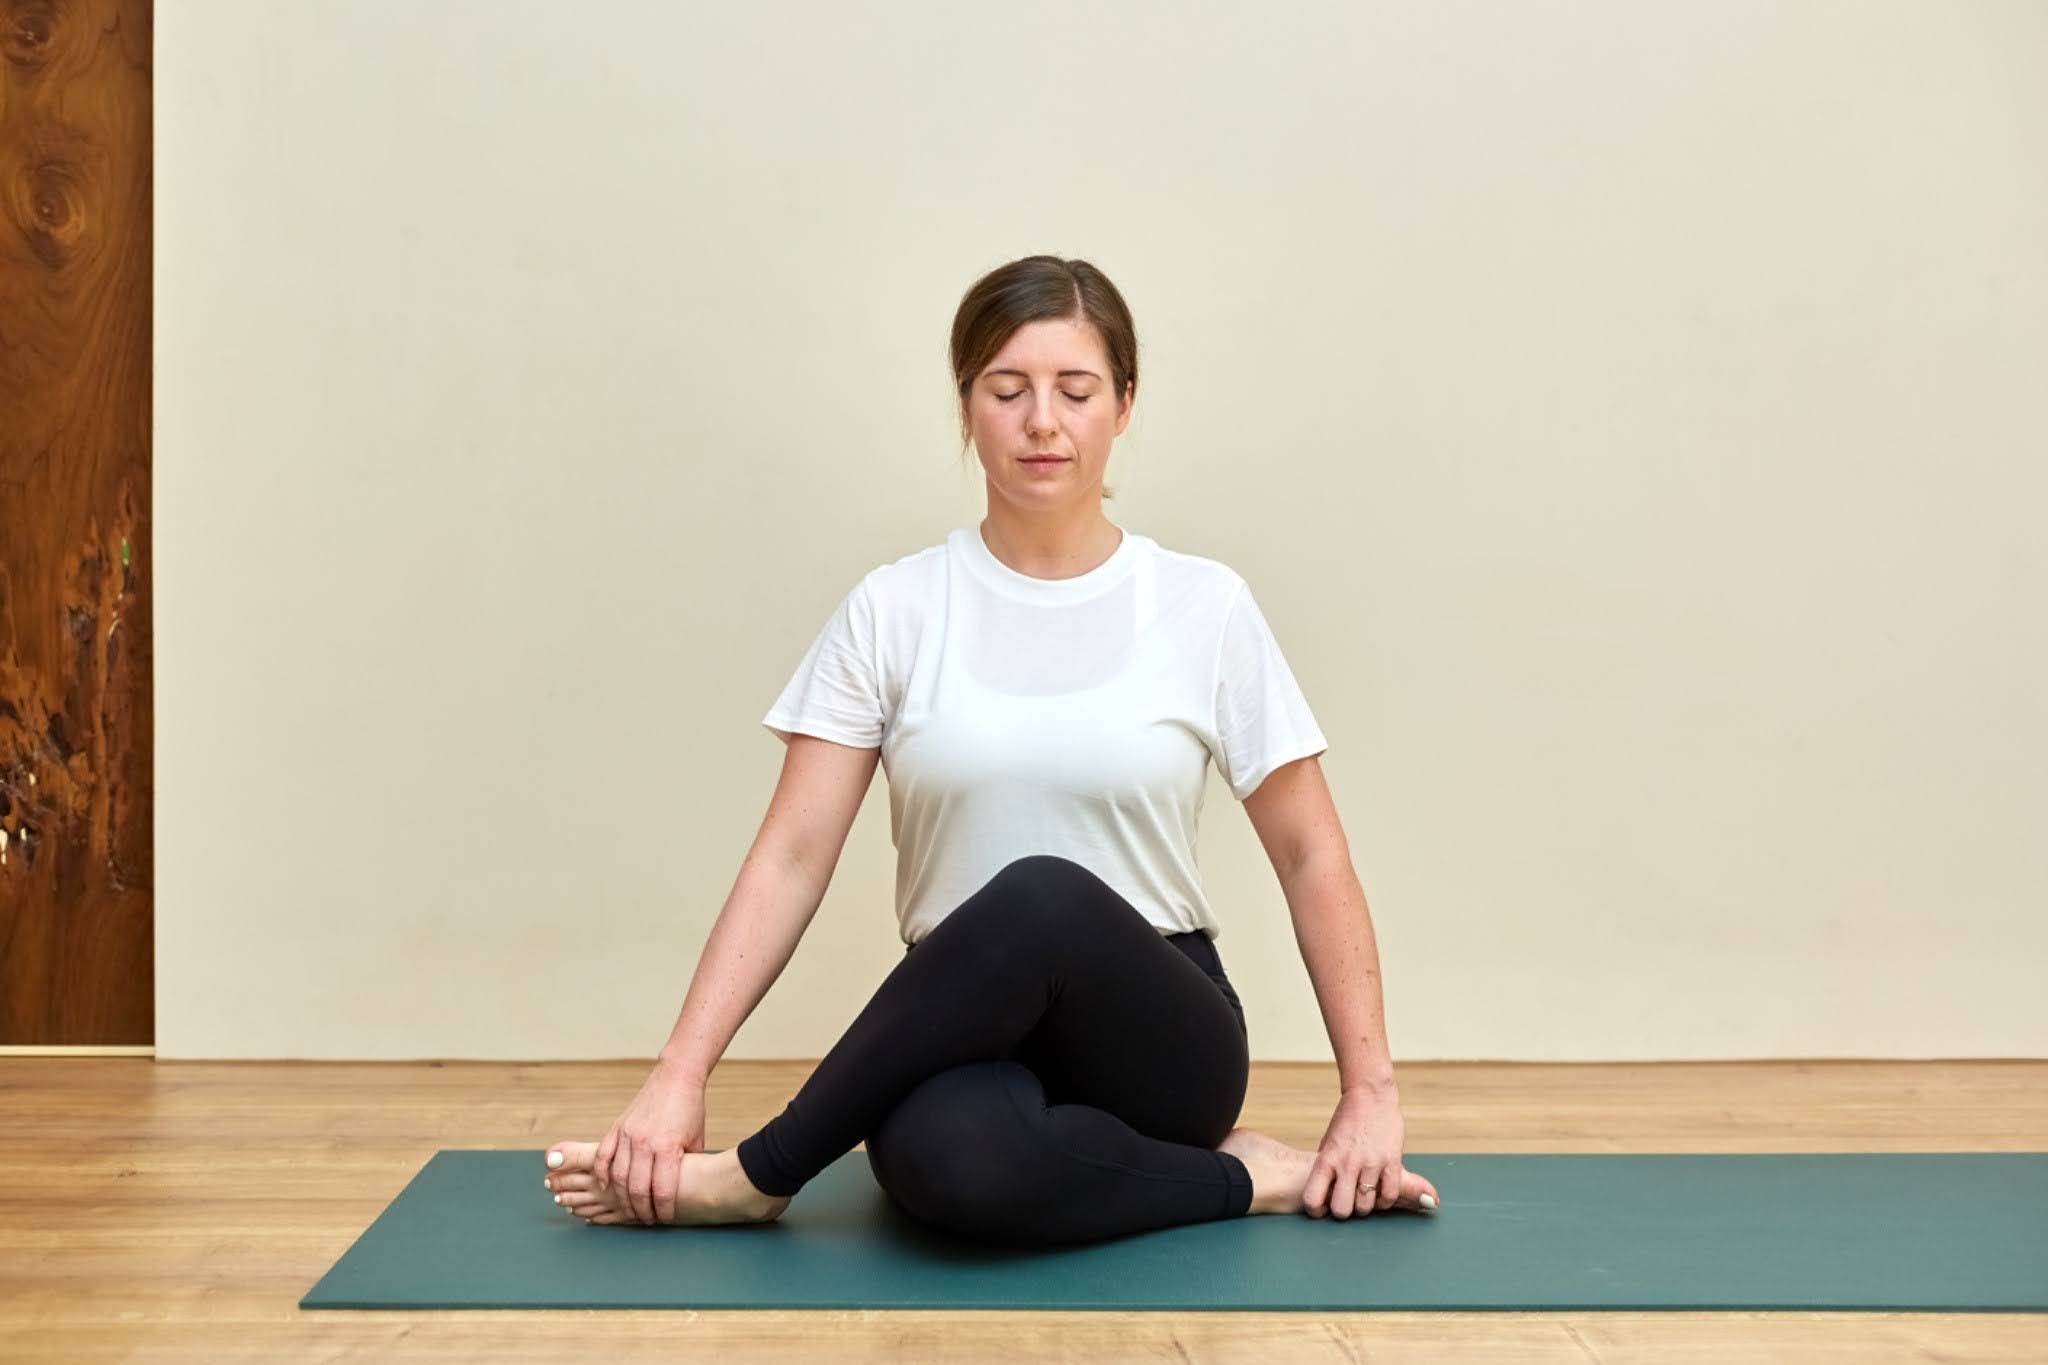
The shoelace pose helps relieve back tension while providing a gentle stretch for the hips and buttocks.
How to: Start by extending your legs straight out in front of you. Swing your right leg over your left, placing your right foot outside your left hip. Stay here in the half shoelace, or go further by bending your left knee and placing your left foot next to your right hip.
Avoid sitting on your feet. If the position is severe, use a pillow or block under your bones. Sit as still as possible for 2-5 minutes or as long as you want.
When you are ready to release, do so slowly. Repeat on the other side.
4. Position of the thread in the needle
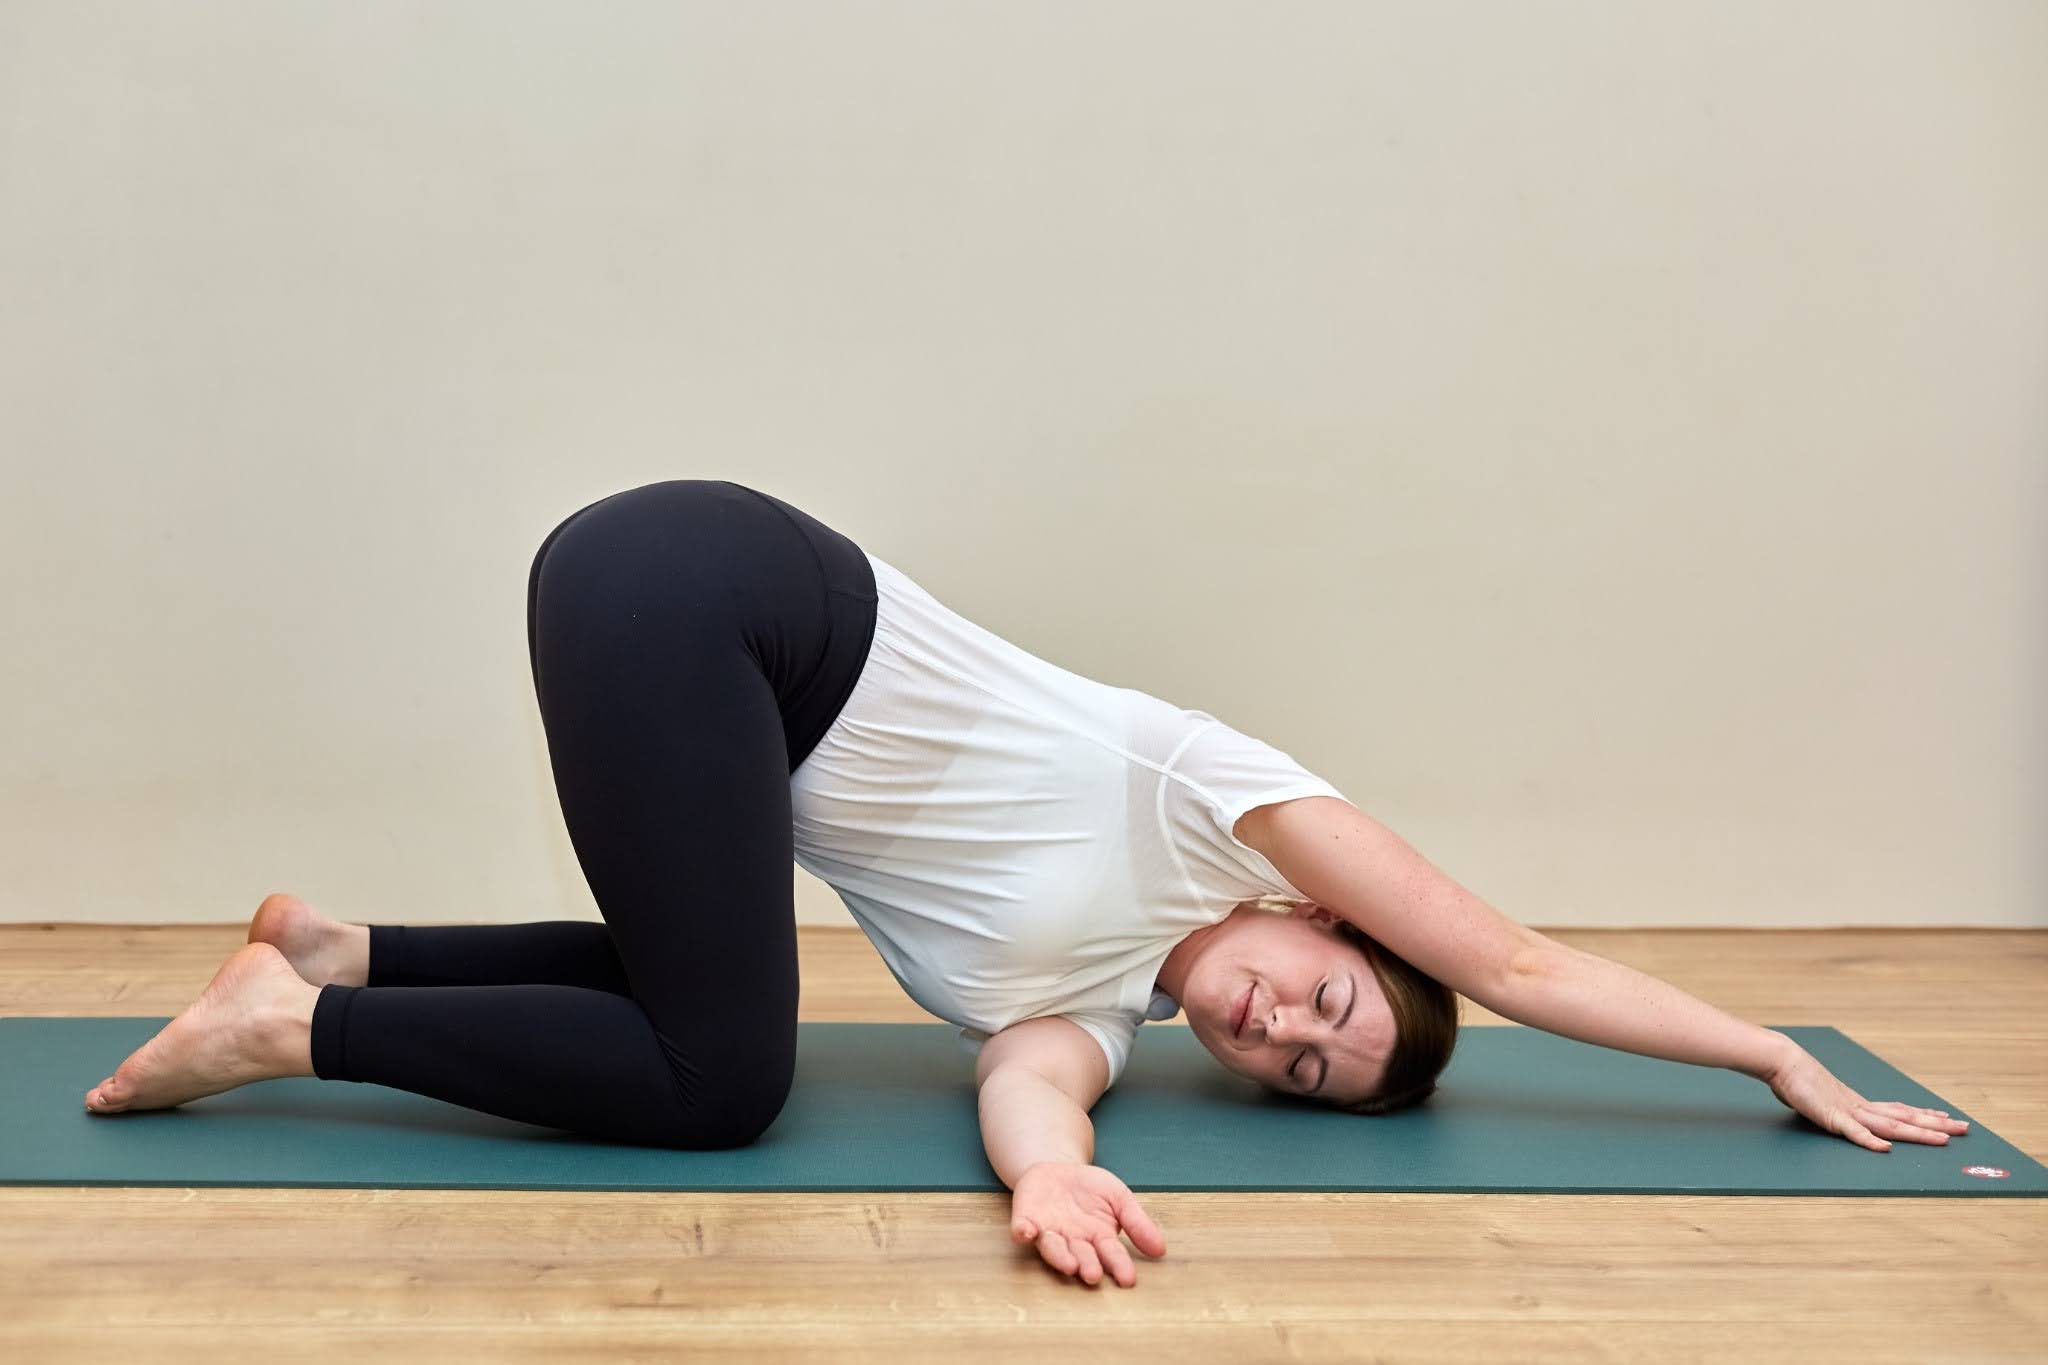
You’ll release tight upper back and shoulders with Thread the Needle Pose.
How to: Start on hands and knees. Feel free to fold your rug or place a blanket under your knees if they are sensitive. Widen your knees if your body feels tight. Then bring your right arm under your left to bring your right shoulder and ear to the mat. (If this is uncomfortable, you can place the side of your head on an ottoman or pillow.) Keep your left hand under your shoulder or extend it forward toward the top of the mat.
Stay here for 2-5 minutes or as long as you want before repeating on the other side.
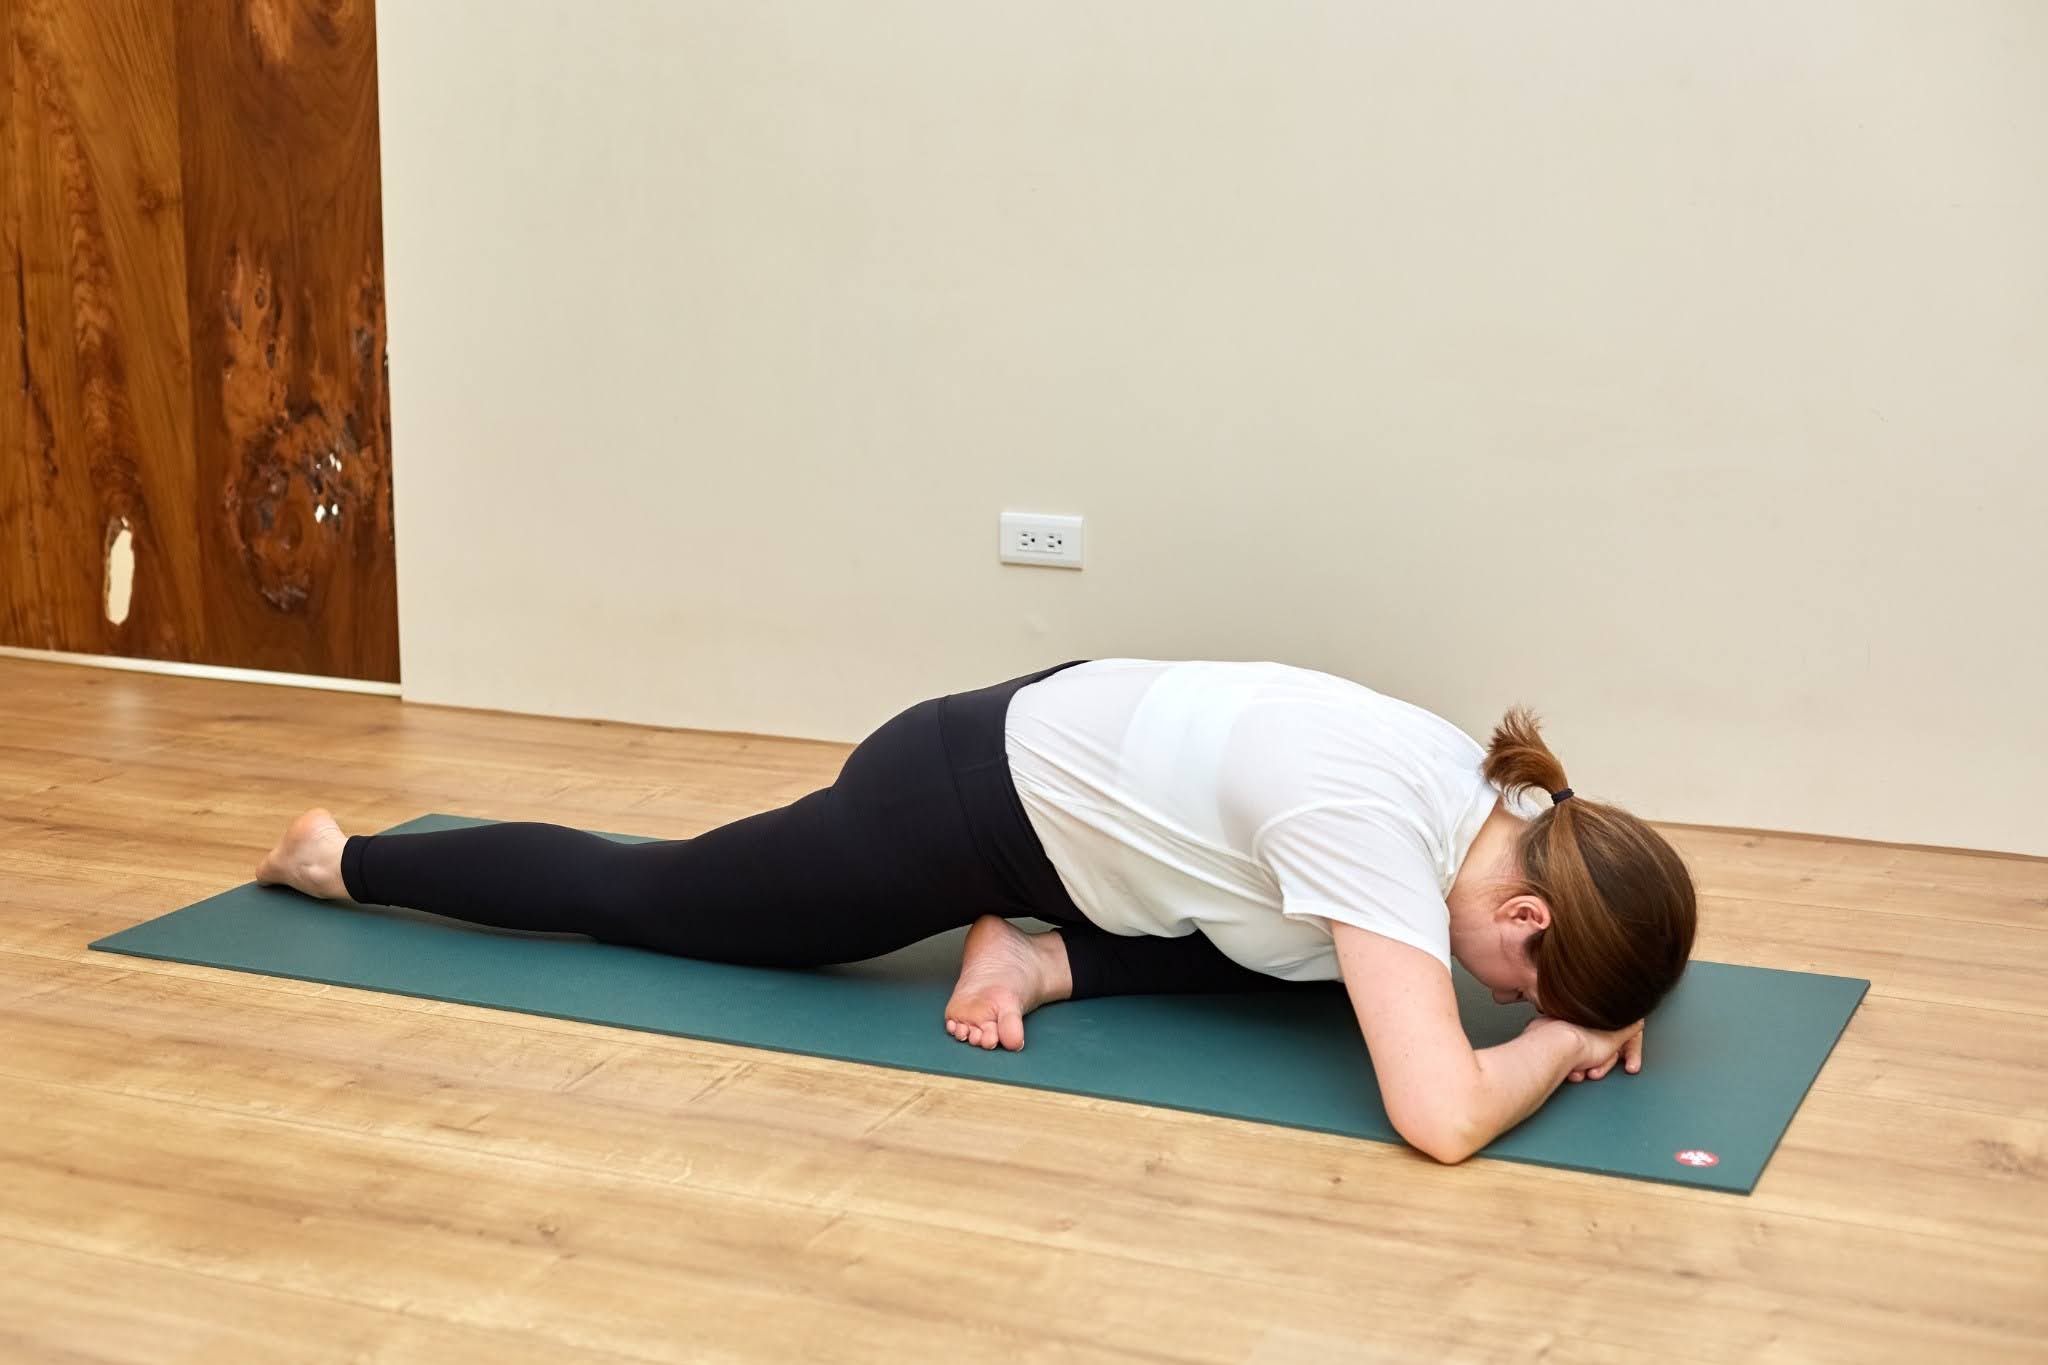
5. Supported fish pose
This version is supported by Fish pose It can help counteract the curvature of your back while opening your shoulders, neck, chest, and upper back.
How to: Place a yoga block (at its middle or lowest level) on top of your mat. Sit in front of the block, facing away, and then slowly lean back, aligning the bottom edge of the block with your shoulder blades. Let the crown of your head rest on the mat or you can place a second block on the lower level or a folded blanket or pillow underneath for support. Relax here with your arms at your sides, palms facing up.
Stay here for 2-5 minutes or as long as you want. When you’re ready, sit up slowly and remove your tools from behind you. Lie flat on the mat and allow your body to engage for a minute or two.
6. Bridge position supported
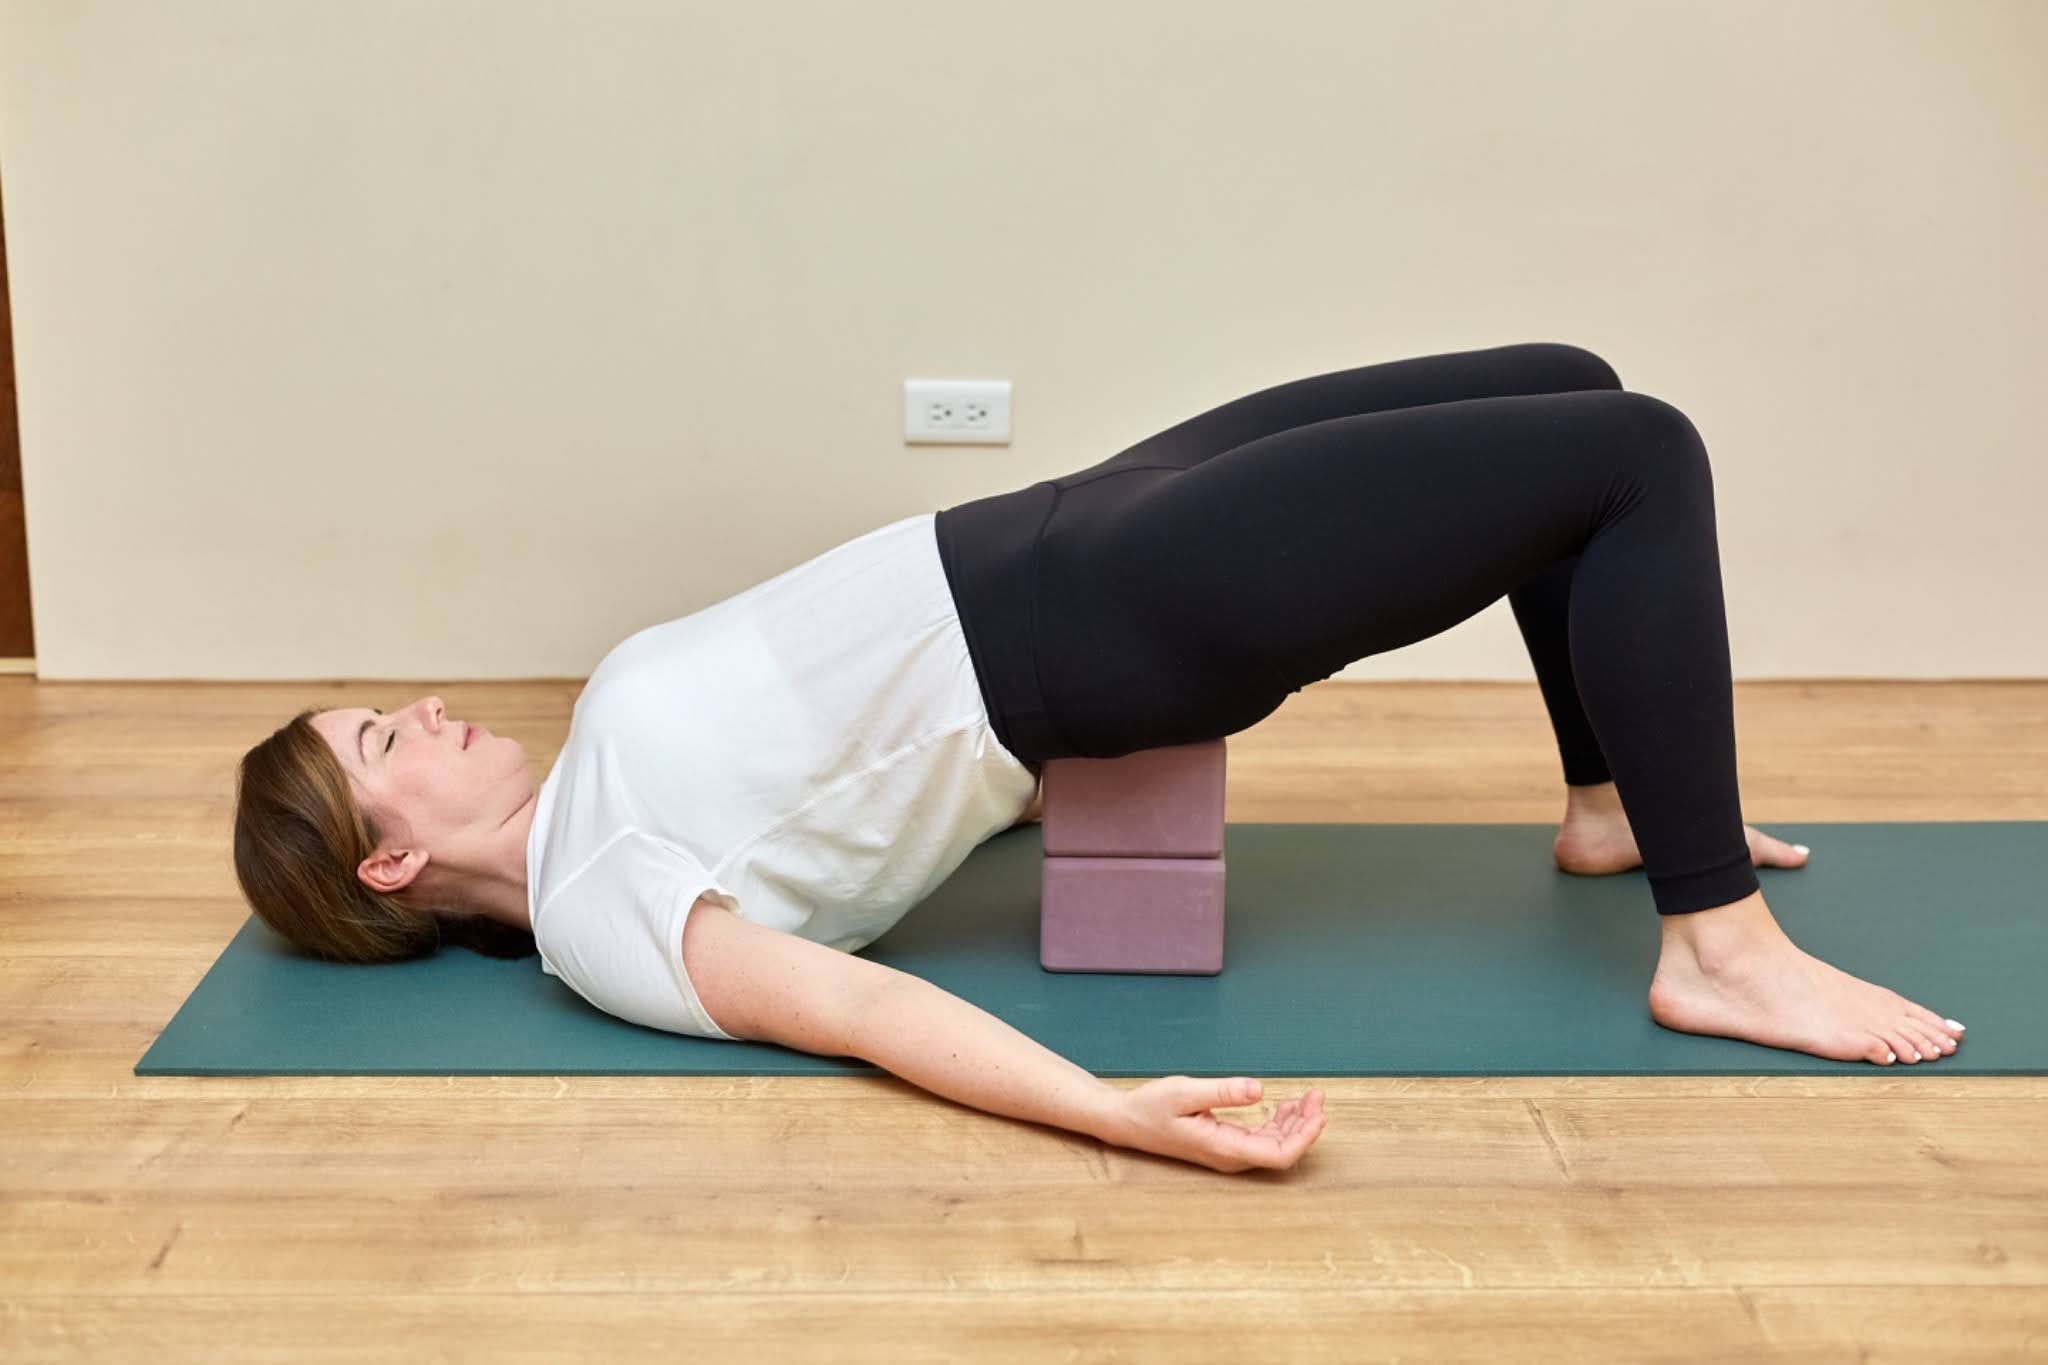
Bridge position It helps to fully extend your spine while releasing the front of your hips.
How to: Start on your back with your knees bent and your feet flat on your mat at hip-width distance. Lift your hips, and place one or two yoga blocks on the lowest level below your sacrum. Less is more here so don’t overdo it. Rest your hands wherever you feel comfortable. Let gravity and your breath do all the work here while you relax.
When you’re ready, slowly come out of the pose by removing one block at a time, then lie on your back for a moment.
7. Reclining twist
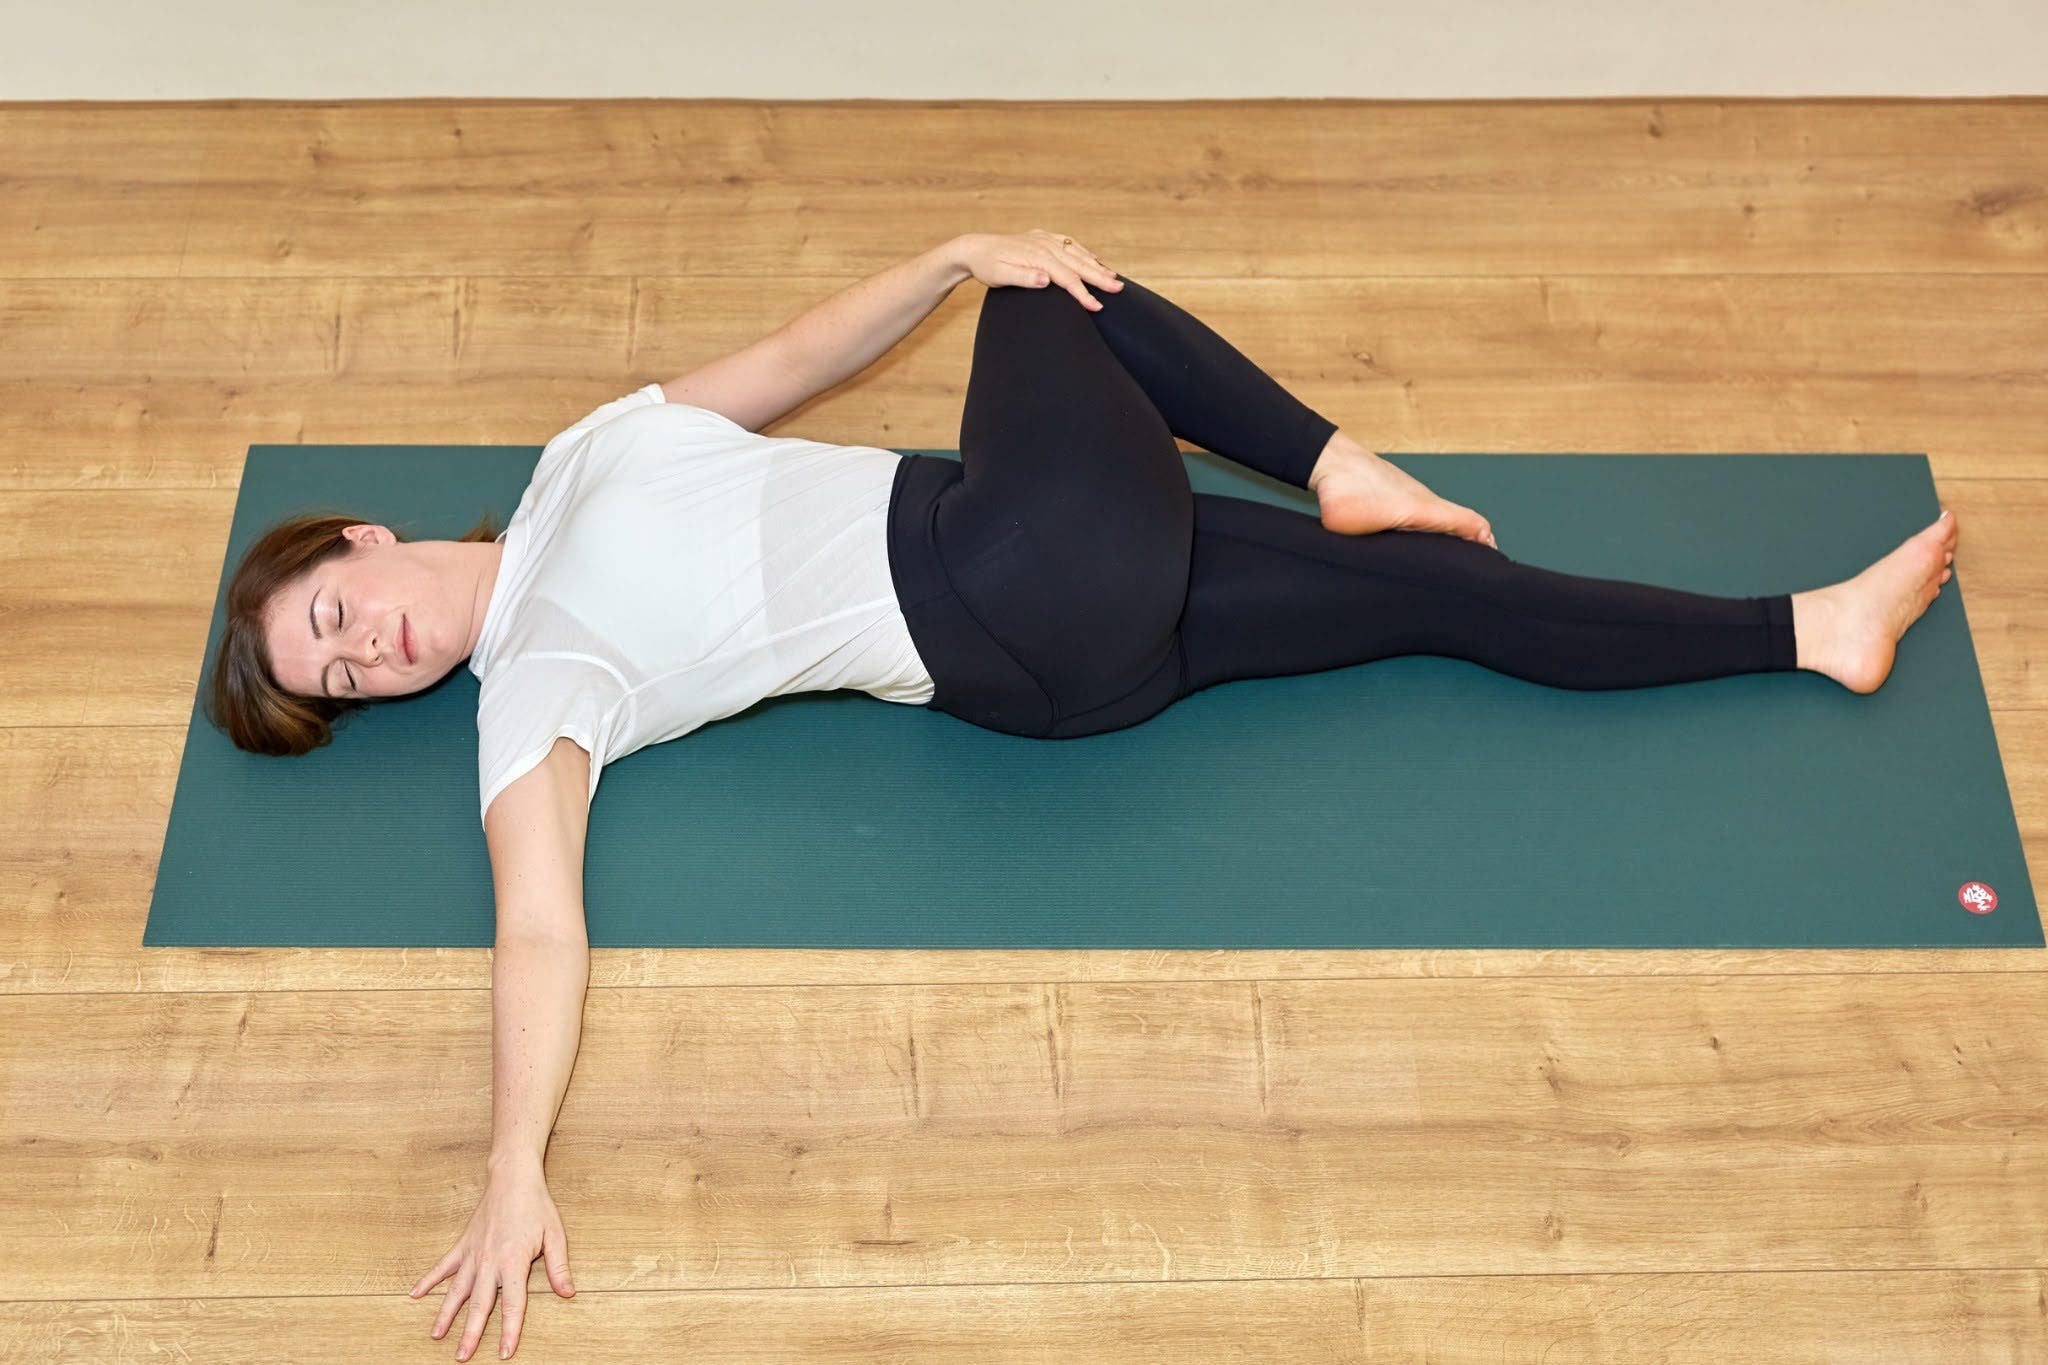
The spine needs to be moved in all directions every day, and sprain is one of the most overlooked things.
How to: Start on your back. Place the sole of your right foot on your left thigh. Use your left hand to guide your right knee across your body toward the left. Stack hips – right hip over left. Extend your right arm straight out to the right if that is comfortable. To go deeper into the twist, turn your head against your knees, keeping your shoulders connected to the mat.
Practice lying on both sides. Release the pose by bringing your knees toward your chest or practicing some gentle windshield wipers.
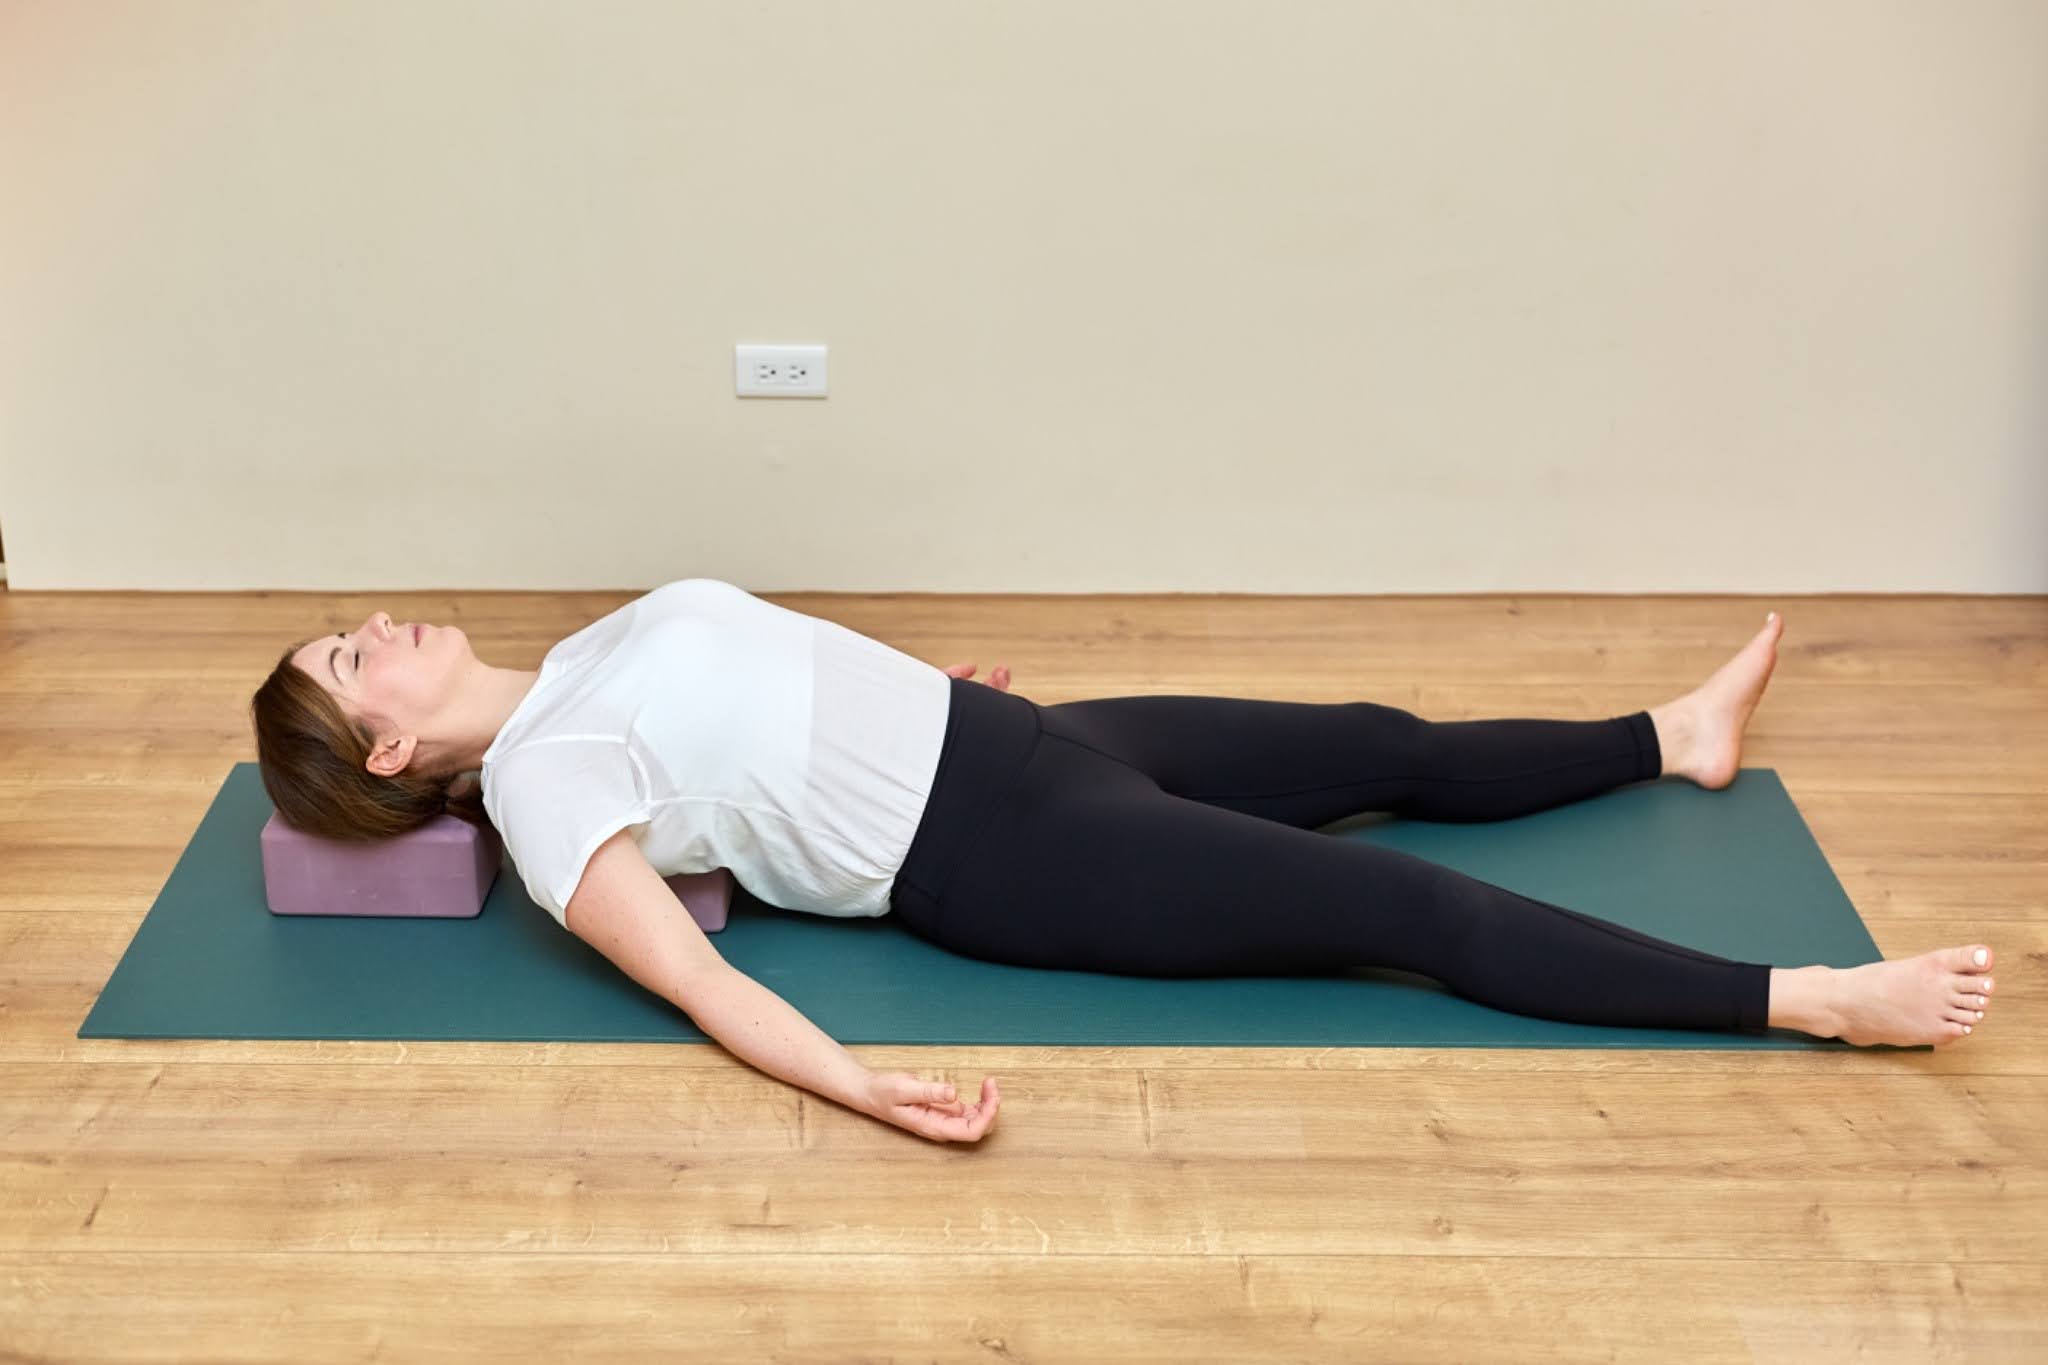
8. Corpse position
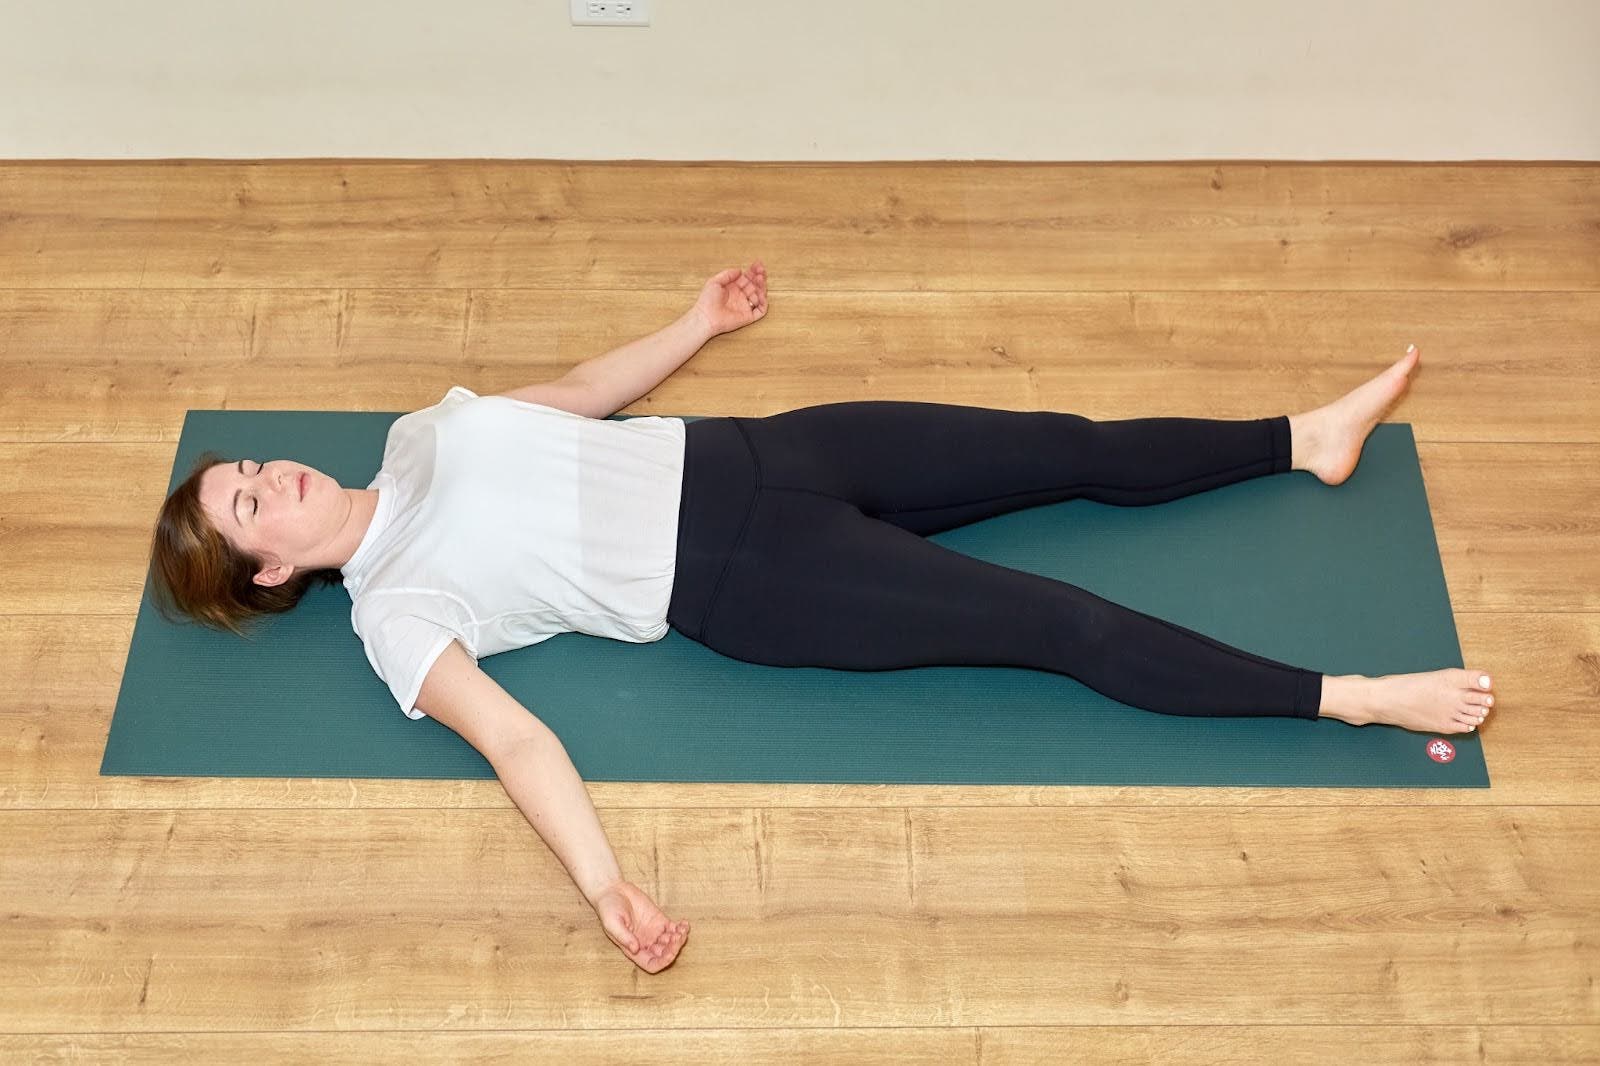
Once you have completed all your positions, take a few minutes to lie down Corpse positionAllowing your body to absorb all the benefits of your practice.
How to: Lie on your back with your palms facing up. Feel free to add a bolster under your knees for added comfort and relaxation.