
Posted on May 7, 2026 at 05:04 pm
Yoga magazineQ archives The series is a curated collection of articles originally published in previous issues beginning in 1975. This article about Locust Pose first appeared in the September-October 1989 issue of Yoga magazine.
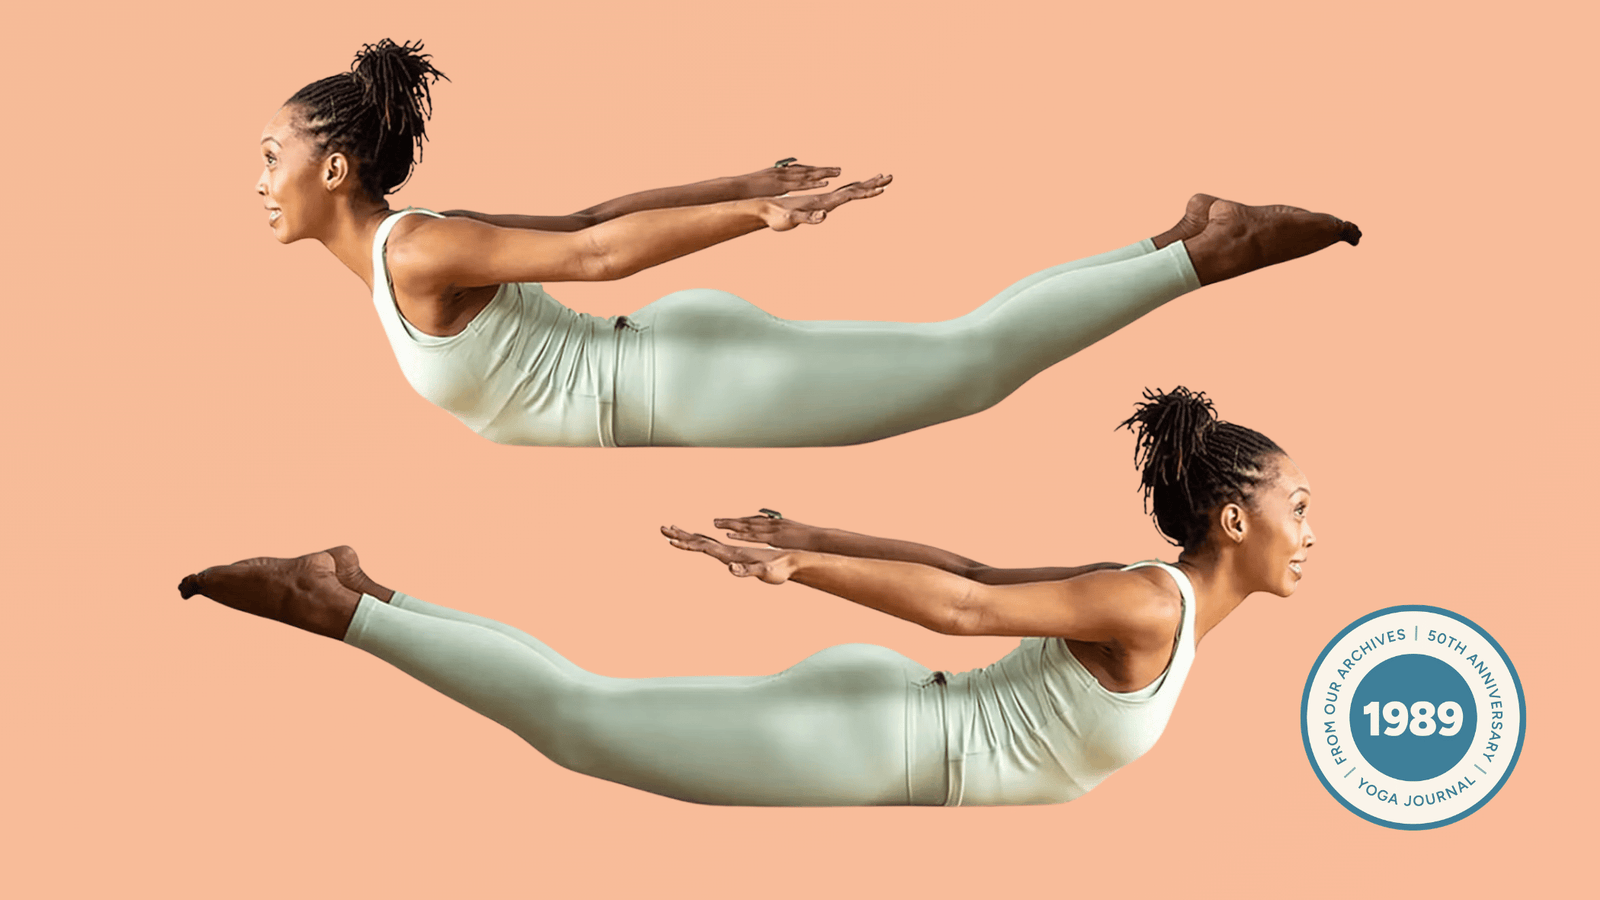
In our study l Salabhasana (Locust Pose) We will explore the basic elements of movement that make up the pose. In this process, we will discover how the buttocks, back of the thighs, upper back, back of the arms, abdomen and inner thighs contribute to spinal health and freedom (Figure 1).
How to Practice Variations of Locust Pose
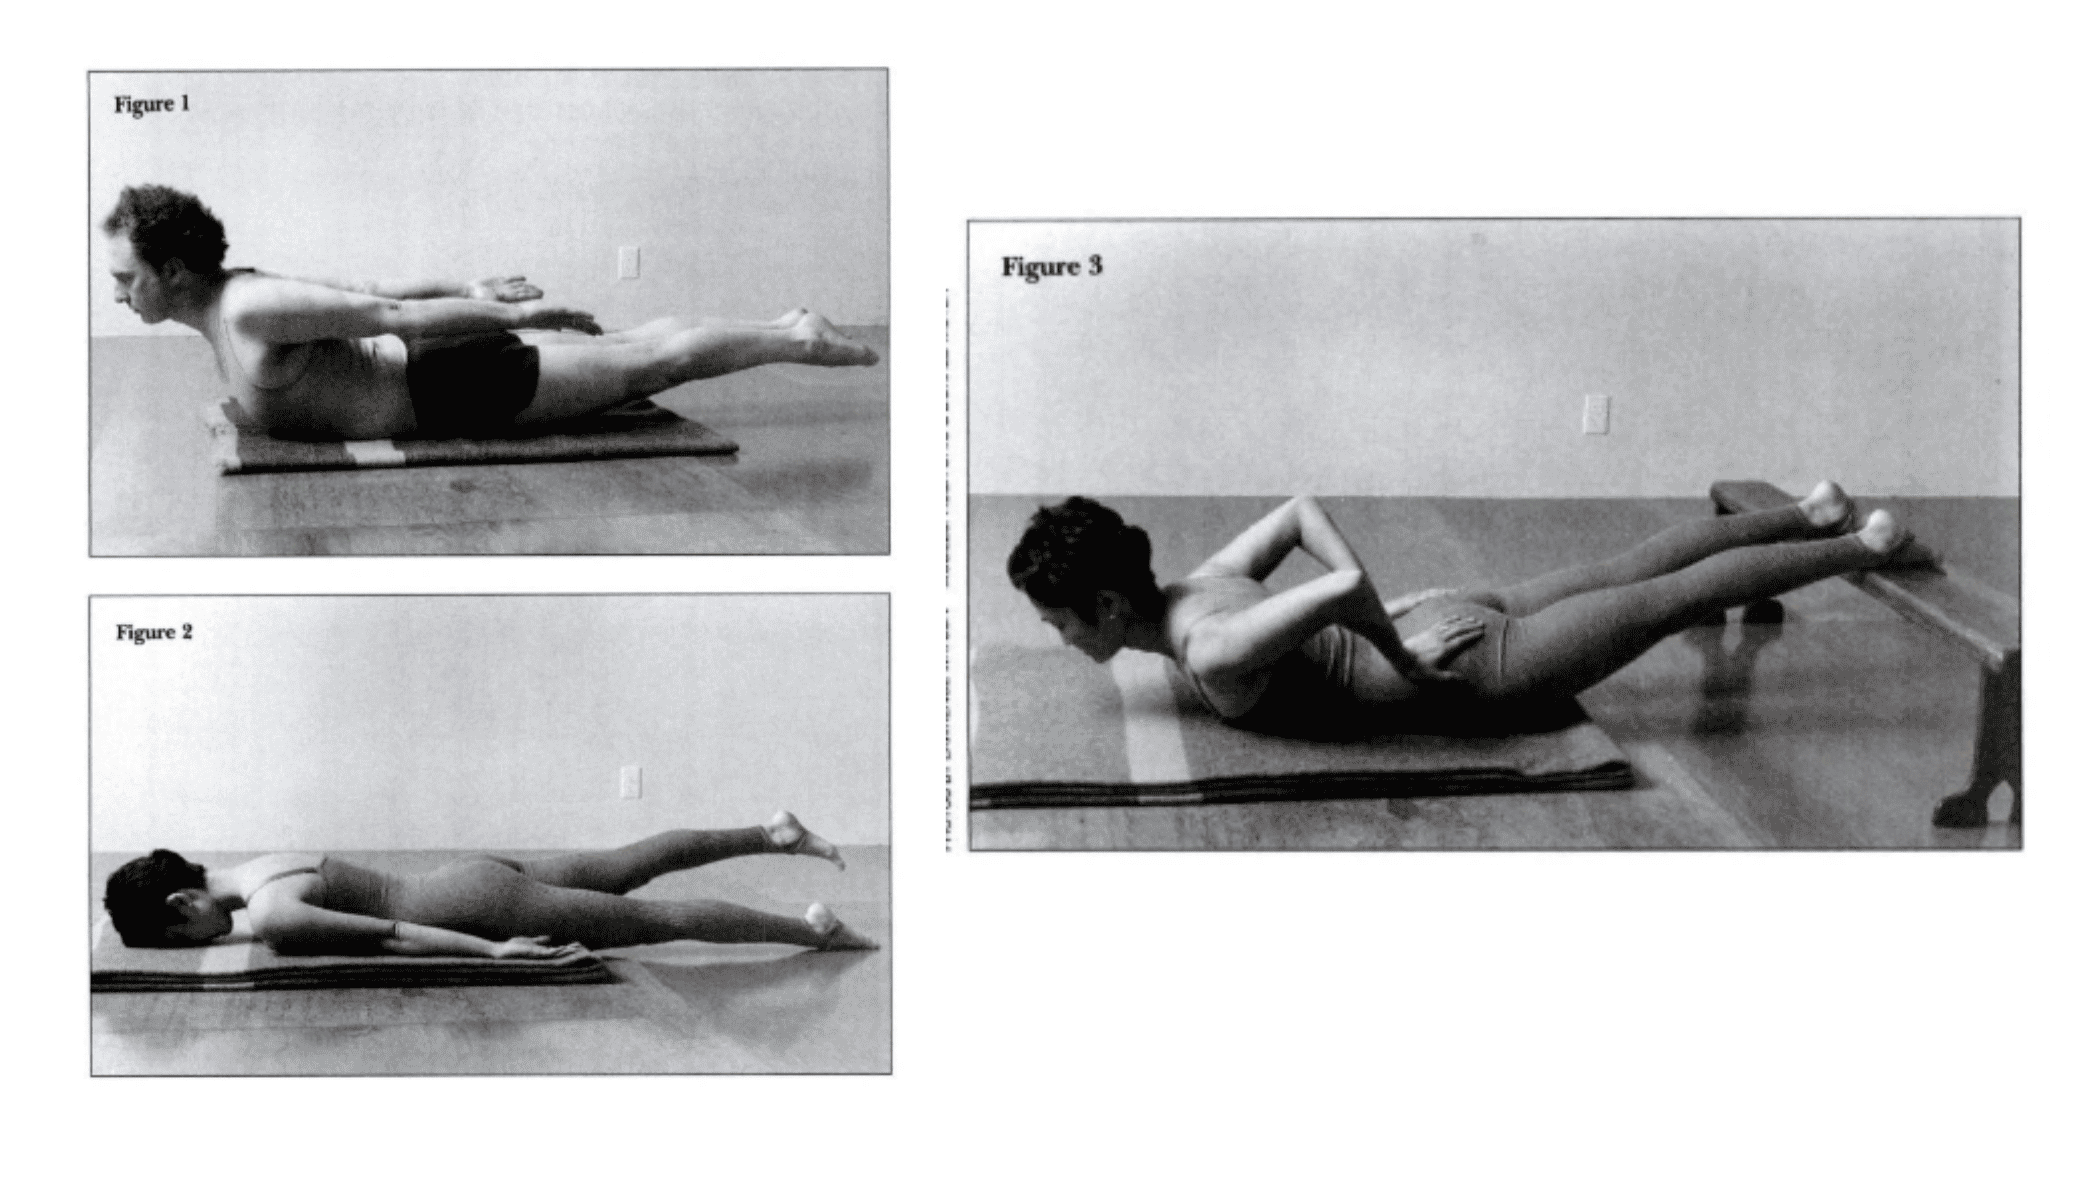
The first type of Salabhasana helps build strength in the buttocks and thighs by raising one leg at a time. Lie face down on your blanket, with your legs together and your arms extended back along your sides, palms facing up. (Alternatively, you can fold your arms in front of you and rest your chin on your hands, if that feels more comfortable for your back.) Then press the tops of your feet into the floor and forcefully extend your legs, as if you were trying to lift your knees off the floor. Keeping the left leg fully extended, raise the right leg a few inches, so that the right hip bone remains in contact with the floor (Figure 2). Hold this position for several breaths, bringing the right femur out of its socket and opening the back of the right knee. Then release the leg and repeat on the other side. To stabilize the pelvis, remember to keep the right leg fully extended when raising the left leg.
1. The tendency to feel discomfort in the lower back
The following variation of Salabhasana is useful in relieving sacroiliac pain for those who feel discomfort after exercise Forward bends.
Start by lying face down on your mat or blanket with the tops of your feet resting on the edge of a bench or low platform (Figure 3). (If a bench or other support is not available, press the bases of your toes into the wall about 10 or 12 inches off the floor.) Now place your hands on your lower back, pressing your thumbs into the sacroiliac joints near the top of your buttocks. Extend the back of the legs from the sacroiliac joints toward the heels, so that the back of the thighs is active, and the back of the knees is open. The buttocks should be firm but not tight. This action will bring the top of the sacrum closer to the body and release any pressure on the sacroiliac joints caused by forward bends. Maintain this position for several breaths, keeping your legs and buttocks strong. Repeat two or three times if it seems to help your lower back.
2. Raise the legs up
Most students have more difficulty raising the legs than raising the upper body in Salabhasana.
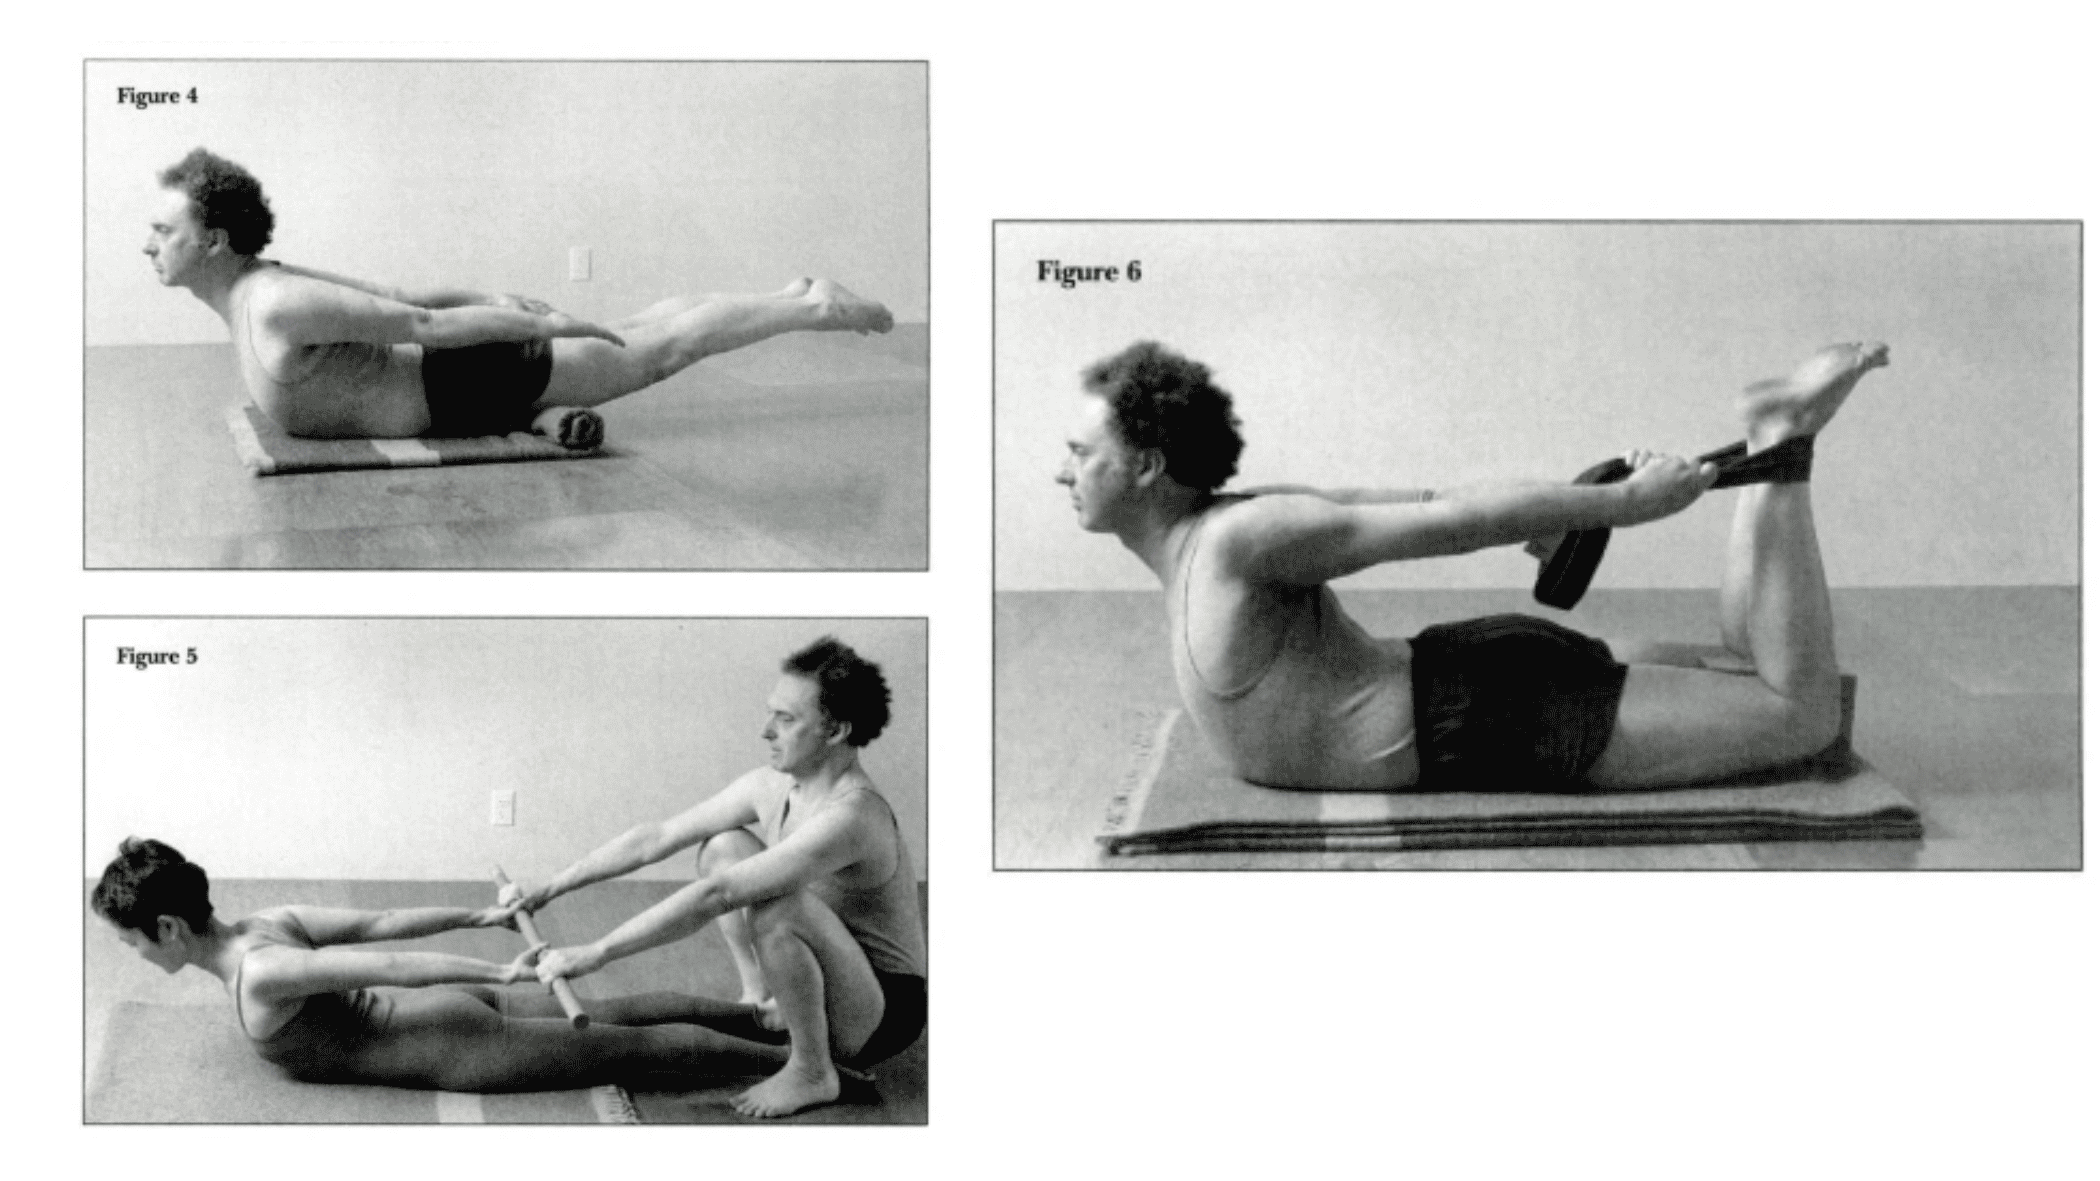
The following variation of the position should help you lift your legs higher, and keep them up longer, with greater freedom and ease. Make a firm roll about three or four inches in diameter using a thick blanket or towel. Then lie face down with the roll supporting the upper part of your thighs just below your hip crease (Figure 4). Keep legs fully extended. Now lift the shoulders off the floor and pull the arms back, either by interlocking the fingers or by moving the palms toward the ceiling. Press your front hip bones into the floor while lifting your hip bones away from the blanket roll, at the same time opening your chest. Hold your breath for several breaths, then release. Repeat two or three times.
3. Strengthening the triceps muscle
The following exercise demonstrates the need to strengthen the back of the arms (triceps) as well as the back of the thighs when practicing Salabhasana. Stand first in Tadasana (Mountain pose) with forearms parallel to the floor and biceps flexed.
Feel how the shoulders bend forward and the shoulder blades lift away from the back rib cage, rounding the upper back. Now release your arms and try the opposite action. Stand in Tadasana with your legs firmly extended and your arms hanging loosely at your sides. Then gently press the skin of the back armpit and lengthen the backs of the arms down toward the little fingers until the triceps muscle makes firm contact with the bones of the upper arms. When the triceps become fixed, the broad muscles of the upper back (the trapezius and latissimus dorsi) are also called into play, pulling the shoulder blades down and allowing the anterior chest to open. The strength and stability of the upper back depends on the strength of the triceps.
Taking care of your triceps is essential for a wide range of poses. In standing poses such as Virabhadrasana I and I (Warrior poses I and secondly), stretching and lengthening the back arms helps reduce tension in the shoulders and open the chest. in Adhu mukha svanasana (Downward Facing Dog Pose), the back of the arms should be pressed up toward the bones to stabilize the arms so the student can lift from the shoulder joints. in Sirsasana (Headstand), extending the back of the arms from the outer armpit towards the floor raises the shoulders and prevents the body weight from pressing on the neck. In sarvangasana (Shoulder holder), Lengthening the triceps toward the elbow allows the shoulders to roll downward and helps lift the shoulder blades off the ground.
The following variation develops our awareness of how the upper arms function in Salabhasana.
Start by lying face down on your blanket, with your arms extended at either side of your torso, and holding a pole with both hands so that your arms are parallel to each other. Allow your teacher or other assistant to kneel or squat next to your feet as shown in Figure 5. Then pull your shoulders and upper chest off the floor by lengthening the backs of the arms toward the elbows. Curve the neck slightly in line with the curve of the upper back, as if it were extending across the crown of the head. When your upper body is in position, your assistant can hold the pole to provide support. For the next few breaths, keep your legs active but allow the weight of your upper body to hang forward from the column, so that the shoulder joints open and the thoracic spine is free. Then slowly begin to firm your triceps and lengthen your arms. Feel how the latissimus muscles in the upper back begin to contract, pulling the shoulder blades down and opening the chest. Hold this position for several breaths, extending the arms back so that the spine can lengthen forward, like the prow of a long, flat boat pushing through the water, sending ripples of current back along the sides.
4. Strengthen the inner part of the thighs
For the next version of Salabhasana, which focuses on working the inner thighs, you’ll need a long belt and a wooden block. Start by lying face down on your blanket or rug. Place the block between your knees and loop the band around your feet. Hold the belt close to your ankles with your arms fully extended behind you. Then press the knees into the block and lengthen the inner thighs, moving the leg bones back into the belt as you lift the head and upper chest. The lower legs should remain perpendicular to the floor (as in Figure 6), but the knees and thighs may rise slightly off the blanket. Feel how your upper spine moves deeper back as you lengthen your inner thighs along the block. Hold this position for half a minute, breathe calmly, then release it.
Repeat two or three times.
5. Relieve shoulder tension
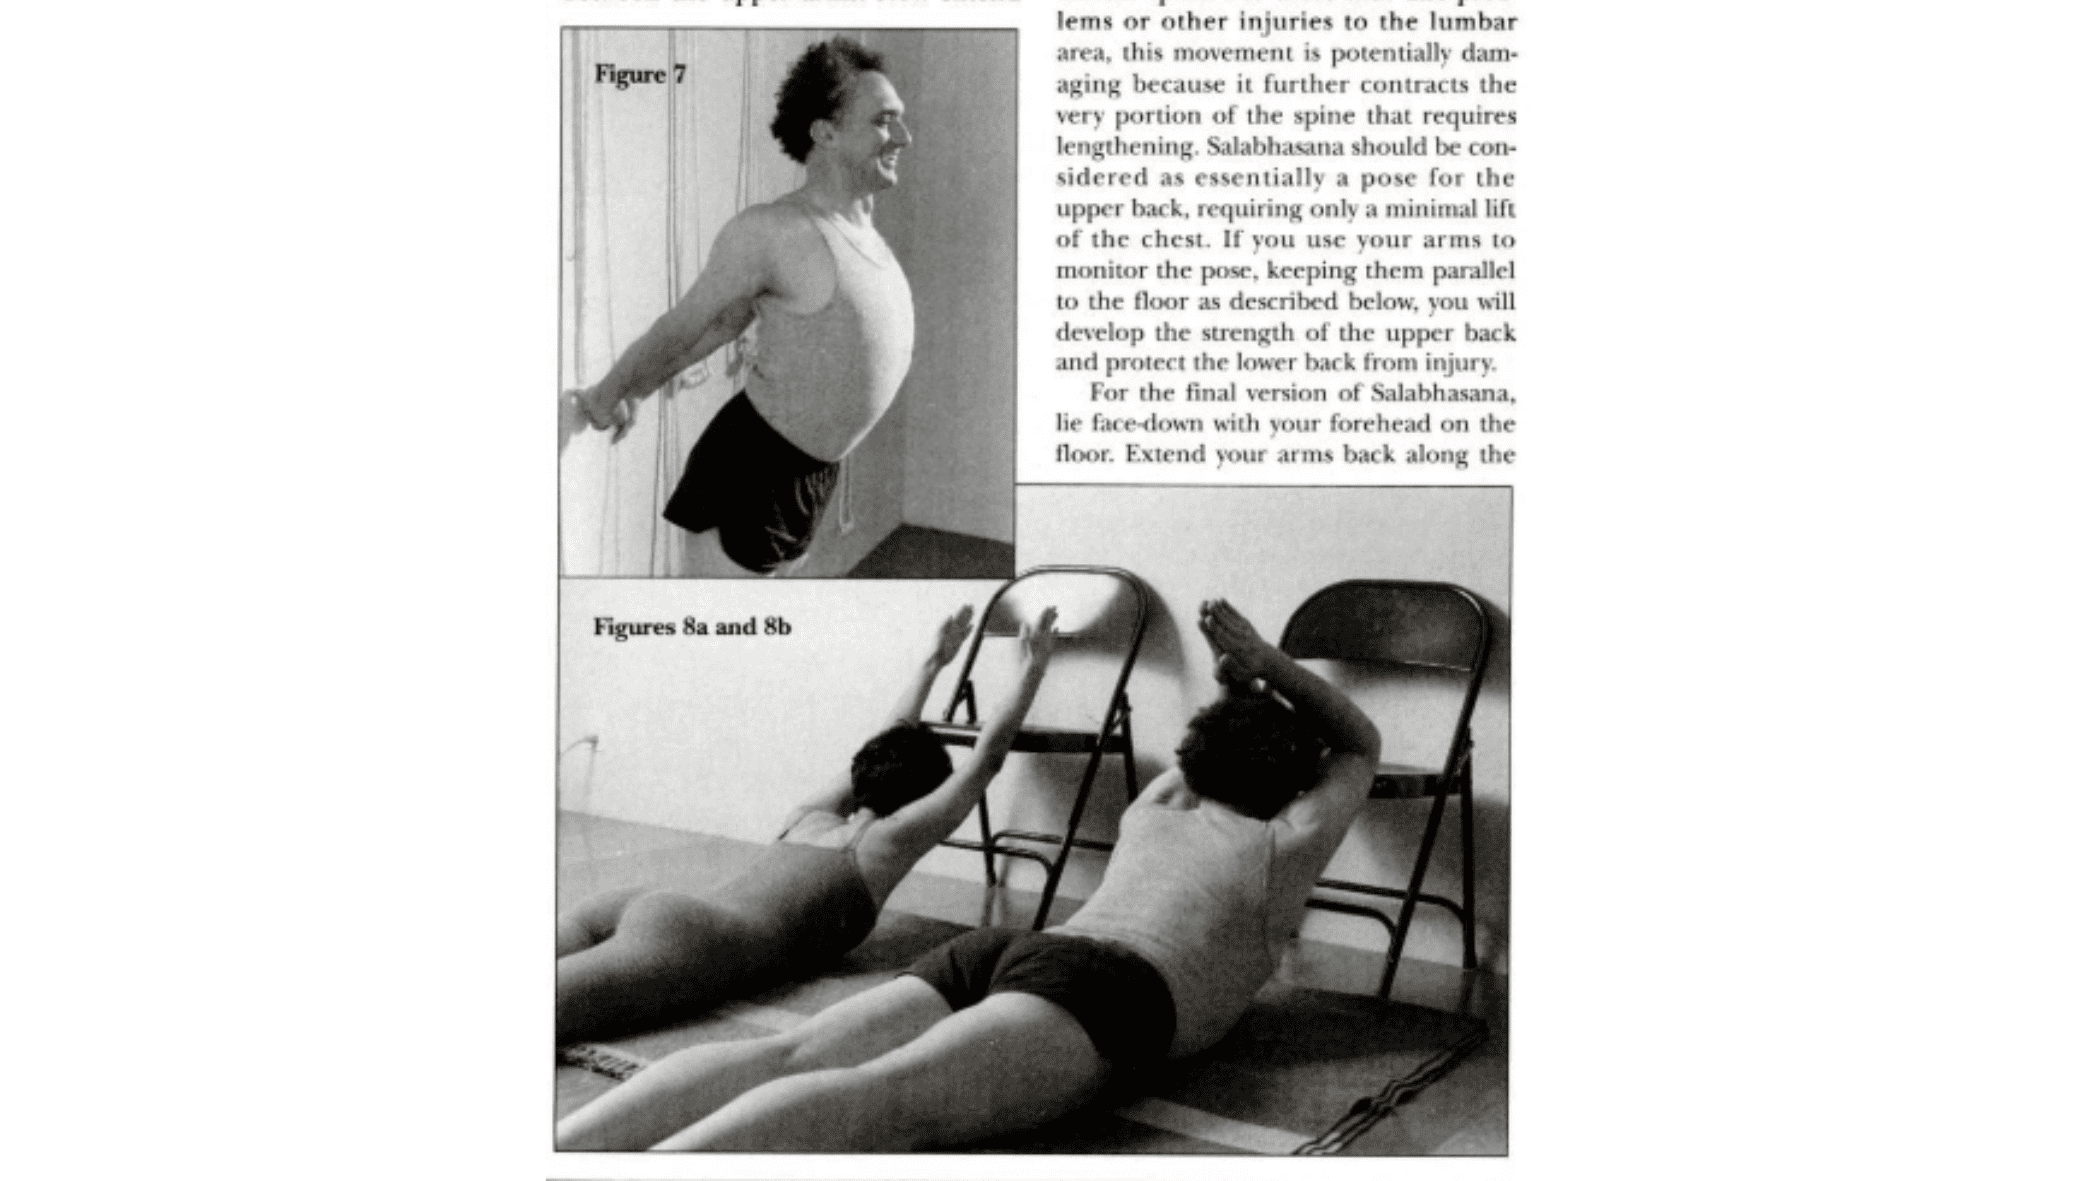
The following variation of Salabhasana helps relieve shoulder tension, especially for those who have developed a thick string of muscles on the slope of the shoulders at the base of the neck. For people who sit at a desk all day with their shoulders turned forward, this exercise can be done easily and without discomfort with just a few moments of rest. Stand in Tadasana (Mountain Pose) with your back to the edge of the open door, holding the door handles behind you. (If you are practicing at a yoga studio where wall ropes are available, hold a barbell at waist level, as in Figure 7.)
Step forward about four or five inches and, with your arms fully extended, allow your entire body to lean forward. Keeping your thighs and buttocks stable, bring your tailbone and sacrum deep into your lower back while lifting the front of your spine. Now lengthen the back of the arms, so that the triceps make solid contact with the bones of the upper arms, pressing the shoulder blades flat against the rib cage.
Maintain this position for several breaths, combining the movement of the arms and legs with the lift of the spine. Then release and return to Tadasana.
If your neck muscles are very tense, repeat this pose, but this time lower your chin toward your chest, so that your head hangs forward and the back of your neck is extended. However, if you are keeping tension mainly in the muscles between the shoulder blades, lift your rib cage and let your head fall back, feeling the stretch at the base of your throat. Then gently press your shoulder blades together to massage knots of muscle tension in the middle of your upper back. Remember to keep your legs active and your buttocks stationary throughout the pose.
The next version of Salabhasana, using a chair, helps eliminate tightness in the shoulder joints. First, place your chair against the wall to prevent it from sliding. Then lie face down on your blanket or rug in front of the chair, with your forearms on the seat of the chair, with your arms fully extended and your palms facing each other, as in Figure 8a. (If the edge of the chair is sharp, you may need to place a blanket or towel over the chair seat.) Don’t let the head hang forward, but keep the cars between the upper arms. Now extend your legs away from the chair, and think of lengthening your entire front spine.
Create space in the shoulder joints by anchoring the triceps to the bone and lengthening the backs of the arms from the outer armpit to the elbows. Hold this position for half a minute, breathe calmly, then release it. More flexible students can repeat the pose by placing the upper arms on the edge of the chair, bending the elbows and pressing the palms together, as in Figure 8b.
Remember to raise the elbows by lengthening the back of the arms.
6. Maintain lengthening of the lower back
In the practice of Salabhasana, many students tend to push the abdomen into the floor in order to raise the rib cage as high as possible. This focuses all the work in the lumbar area rather than the thoracic area and tightens the paraspinal muscles on either side of the lumbar spine. For those with disc problems or other injuries in the lower back area, this movement is potentially harmful because it increases contraction of the same part of the spine that requires lengthening. Salabhasana should be thought of as an upper back pose, requiring only a minimal lift of the chest. If you use your arms to monitor the posture, keeping them parallel to the floor as shown below, you will develop upper back strength and protect your lower back from injury.
For the final version of Salabhasana, lie face down with your forehead on the floor. Extend your arms back along the sides of the body with the palms facing the ceiling.
Then, without lifting the head off the floor, bring the shoulders back and raise the forearms just a few inches so that the arms are parallel to the floor before you begin the pose. Now brace your triceps and pull the upper arms back to lift the head and shoulder girdle, at the same time lift the legs and brace the back of the thighs. Let the spine lengthen forward while the arms and legs lengthen back. Do not throw the head back, as this tightens the muscles at the base of the skull, but rather consider stretching through the crown of the head.
Pull your lower abdomen slightly away from the floor and lift your legs up. Maintain this position for several breaths, then rest and repeat two or three times (Figure 1).