
In class, this transition can be a struggle. But it doesn’t have to be so.
(Image: Andrew Clark; Canva design by Laura Harrold)
Published on June 3, 2026 at 06:35 AM
You know that moment in the vinyasa that you are in somehow Are we supposed to move from Chaturanga to Up-Facing Dog? If so, then you are also aware of the fact that it is not the most organic movement. The transition can be quite confusing; How are you supposed to shift the weight into your arms and flip your feet in the second or two between poses? Even if you manage to do this, you may experience wobbly arms, a body part that sinks into the mat, and rug-burned big toes.
Although this transition is usually accelerated during the semester, there are a few different ways to deal with it. By testing these options yourself, you can find one that helps you distribute weight more evenly across your arms and big toes in a way that is more sustainable and less painful.
4 Ways to Transition from Chaturanga to Upward-Facing Dog
You can explore these possibilities for transitioning between Chaturanga and Upward-Facing Dog during class or at home. Since Upward Dog involves a large backbend, prepare for it by first moving through several gentle backbends including cat–cow Or Baby Cobra. Stretch your feet It can help too.
Although vinyasa practices typically move in one breath per pose, feel free to move more slowly to explore the transitions that work best for your body. You can take your time in a group class too, even if it means ending up a few steps behind the rest of the class.
1. Lower your knees on the mat
Placing your knees between Chaturanga and Upward Dog makes it easier to place the tops of your feet on the mat because you’re transferring your weight to your knees and hands. Slide a blanket under your knees for extra support.
How to: from Chaturangalower your knees to the mat and open your toes. Inhale as you press the tops of your feet into the mat and straighten your arms as you lift your chest. Keep your knees on the mat or straighten your legs behind you and bring your knees inward Upward-facing dog.
2. Lift and turn one foot at a time
This transition often feels more natural than moving both sets of toes back at the same time. However, since they are asymmetrical, you may want to change which foot you turn on first until you feel more “balanced.”
To familiarize yourself with footwork, come to your hands and knees and step one foot back; Press the ball of the foot into the mat and reach through your heel (as you would in Chaturanga). Then flip your foot over, pressing the top of your foot into the mat (as you would in Upward Dog). Keep most of your weight in your hands and your opposite knee.
How to: From Chaturanga, lift one foot and flip it over so the top rests on the mat. Transfer some weight to it, then repeat the same action with the opposite foot. Your feet don’t need to actively “point”; You can simply open your toes. Press the tops of both feet into the mat as you inhale, straighten your arms, and lift your chest into Upward-Facing Dog.
3. Keep your toes tucked
Although it may seem rebellious, you always have the option of skipping the toe curling process altogether and keeping your toes tucked in. Wave To downward facing dog. This strategy makes what can seem like a difficult transition easier.
However, the tucked toes in the Upward Dog lift the legs higher, which can intensify the arch in the lower back. If this is uncomfortable, lift your pelvis higher or keep your elbows bent to reduce the back bend in Up Dog, a variation that also strengthens the arms.
How to: From Chaturanga, keeping your toes tucked as you inhale, press your hands into the mat, and straighten your arms into upward-facing dog. You can also keep them tucked while raising your hips into a downward-facing dog position.
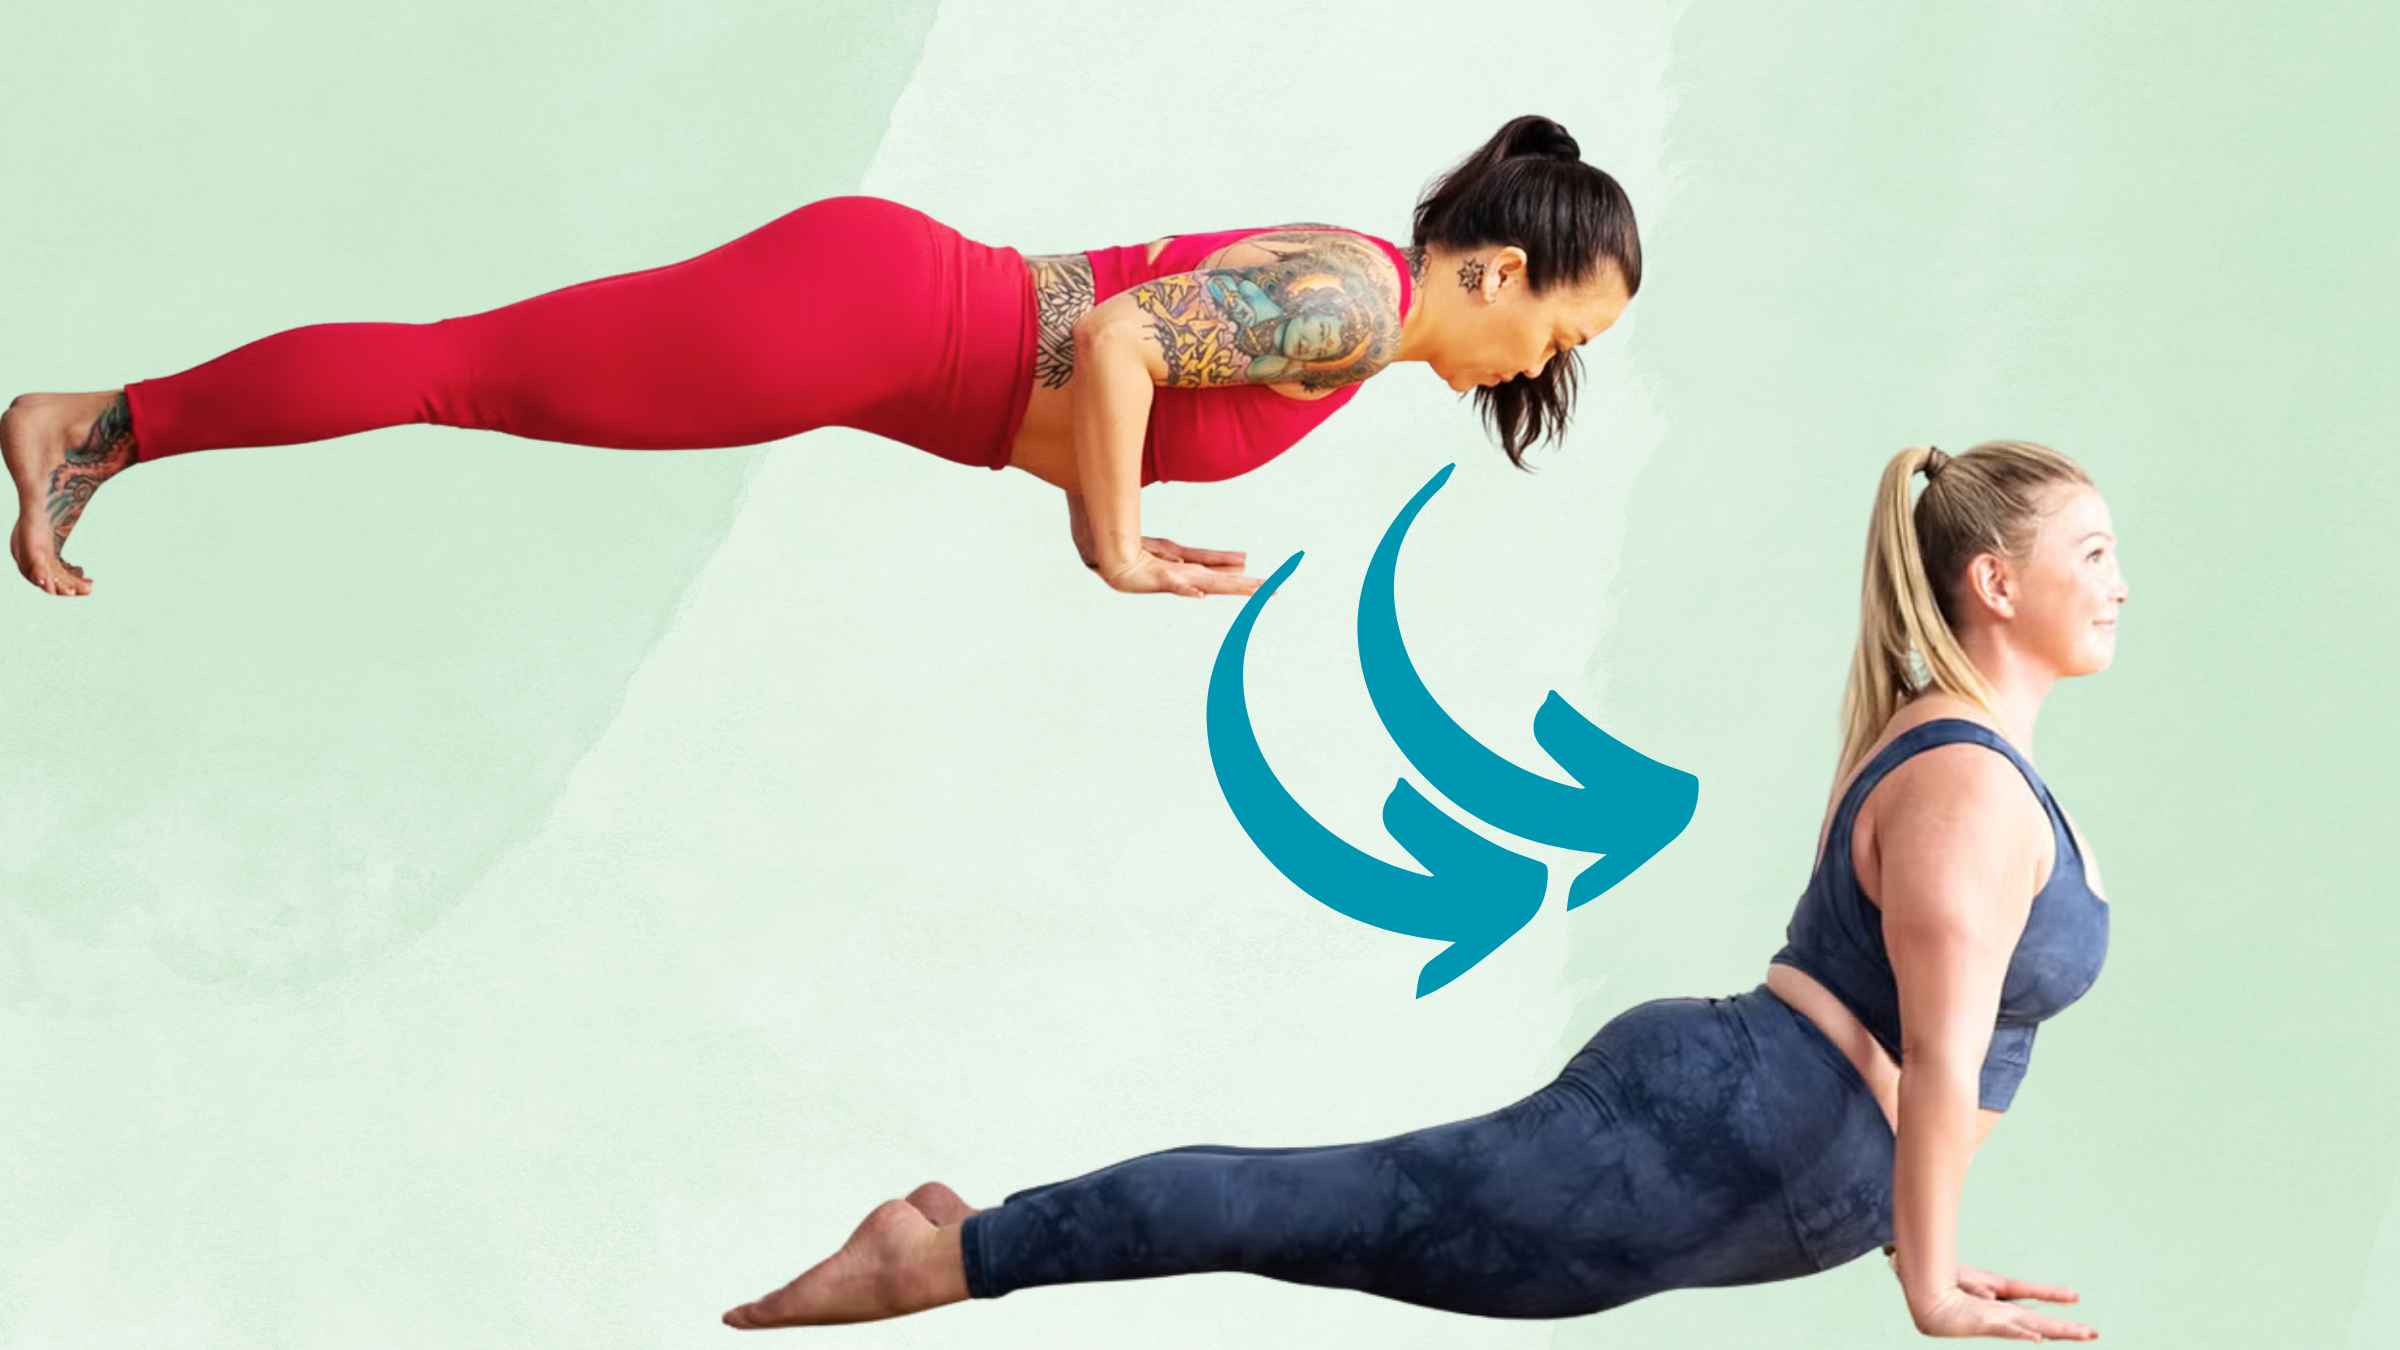
4. Roll on both feet at the same time
This is the most consistent transformation, but also the most challenging. It is essential that you lift your chest forward enough and hold enough weight in your arms to free your toes so you can roll over.
You’ll likely find it easier to roll on both feet at a steady pace, rather than too slowly, so you don’t trip over your toes. However, there is bound to be some friction between the big toe and the mat. Tip: While you’re getting used to this transition, tape bandages or athletic tape over the tops of your big toes.
How to: From here, the Chaturanga reaches your chest slightly forward and holds most of your weight in your hands. Think of your body moving as a unified whole, from your toes to the top of your head. Draw your belly button toward your spine instead of letting it fall toward the mat. Step over both sets of toes so that the tops of your feet are pressing into the mat. Straighten your arms and lift your chest into an upward-facing dog position.
disparity: Try practicing Chaturanga on a bolster placed longitudinally on your mat (supporting you from chest to pelvis). From there, practice flipping both sets of toes and pressing Upward Dog. Consider drawing your ankles toward each other to prevent them from spreading out to the sides. Practicing cradling a block between your ankles can also help.
Take a close look at those in-between spaces as you practice – such as moving from Chaturanga to Upward Dog or from Upward dog to downward dog– Reveals the possibility of greater ease or greater challenge. Most of all, it helps you practice discernment to choose what you need at that moment.