
Posted on May 14, 2026 at 02:14 pm
Yoga magazineQ archives The series is a curated collection of articles originally published in back issues beginning in 1975. This article about Schuldstand first appeared in the January-February 1982 issues of Schuldstand magazine. Yoga magazine.
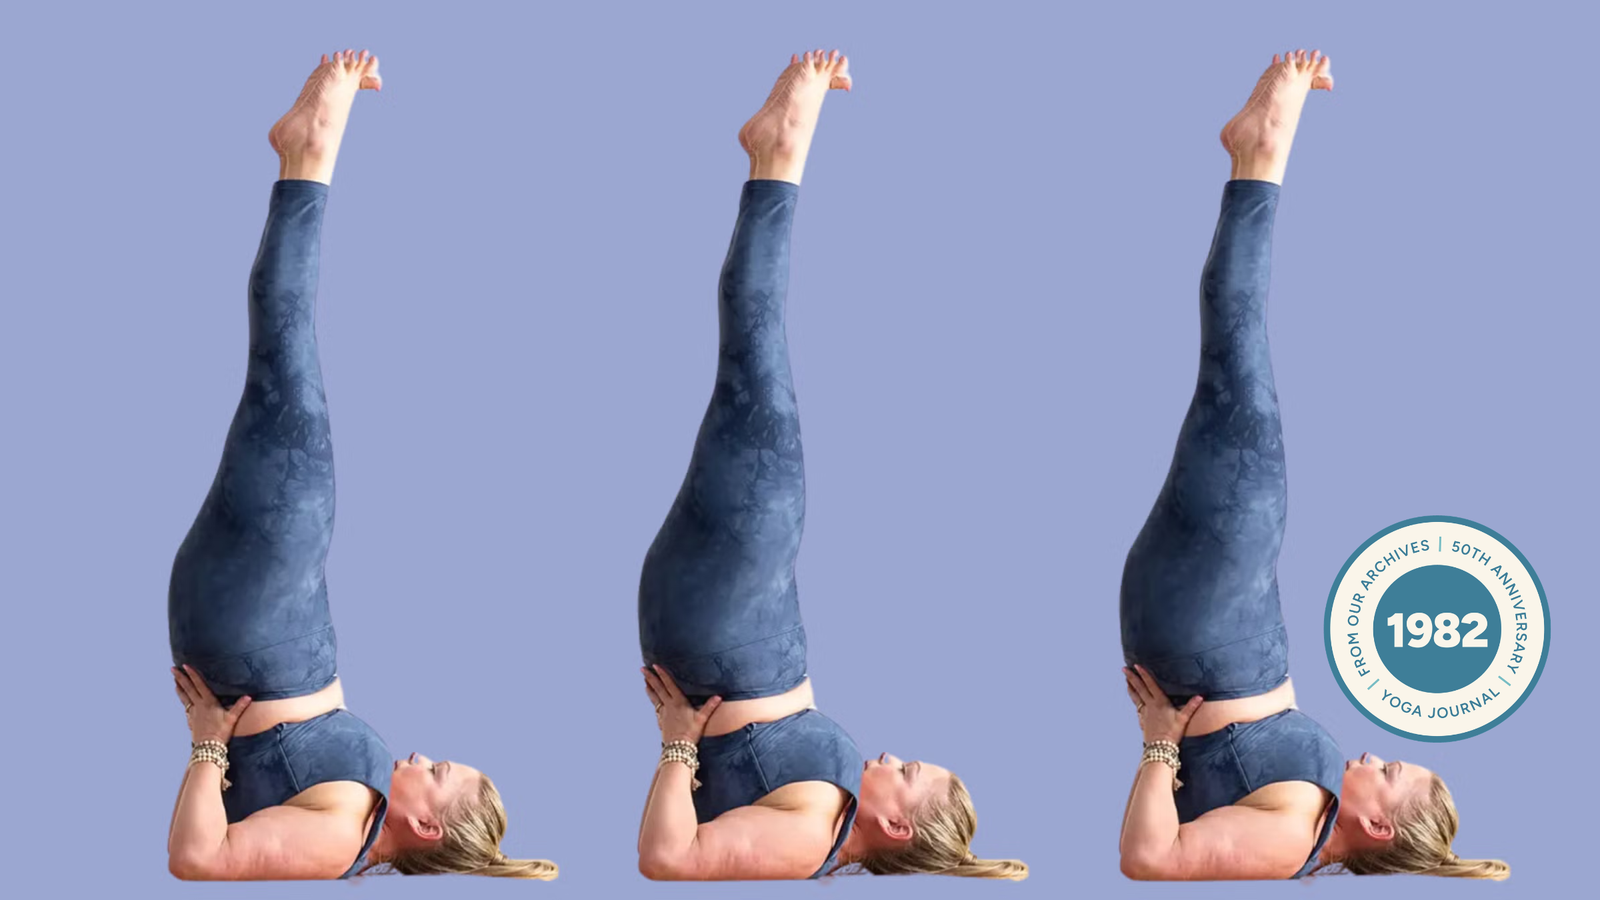
The Shoulder Stand (Sarvangasana) is one of the Basic yoga poses. Not only does it provide the unique and important psychological benefits of inversion, but with its variations it can also provide a mini-asana session for the busy student.
The translation of the Sanskrit name “Sarvangasana” is “sarva” meaning “all” and “anga” meaning “limb”. Thus, Sarvangasana is an asana that benefits the entire body, especially through metabolism. It is interesting to note that science agrees with the ancient yogis.
Recent scientific studies have proven that turning the body upside down increases venous blood flow from the lower extremities to the heart and increases blood flow to the thyroid gland, located just above the sternum.
Another benefit of turning the body upside down is the effect it has on the venous system. Unlike arteries, veins do not have a muscular lining and therefore cannot control their diameter by contracting and relaxing. This fact, combined with the force of gravity, tends to allow blood to pool in the legs.
Without muscle activity, blood does not return to the heart, and blood pressure drops. Consequently, oxygen reaching the brain is reduced, and a person can feel dizzy or dizzy, sometimes enough to faint.
A shoulder mount can help alleviate these issues. It can be especially useful for relieving fatigue at the end of a busy day. Runners say it can also help prevent leg pain, perhaps by helping drain waste from muscles.
Variations of the shoulder stand include bending forward (Plow positionHalasana (backward bend)Bridge/Setu Bandha Sarvangasana), twisting (Parsva Sarvangasana), as well as Lotus Bridge (Parsva Urdhva Padmasana in Sarvangasana). These variations, as well as others, work the spine in most ways and can provide an almost complete yoga session when practiced through shoulder stands for 5 to 10 minutes.
This series of stretching and contracting exercises for major muscle groups as well as the spine and major joints.
The physiological benefits of the shoulders are no less important than the psychological benefits. The shoulder stand is sometimes called the “Great Mother Pose” because it gives the nurturing and soothing effects on the body and mind that a mother gives to her child. In addition, while practicing shoulderstand, one cannot look outward at the world; One looks towards the heart. This asana is a good time to observe one’s emotional life and see how it may or may not reflect the purity and equanimity of yoga. One way to bring calm into the pose is to take awareness away from the eyes, which are always looking outward, and let this awareness descend to the back of the brain so that the eyes become receptive when they are open. When the student does this, there is tenderness and calmness in his eyes. This reflects the inner stillness that the asana can generate.
How to practice shoulder stand
When a person is ready to practice shoulder stand in the center of the room, the mats should be carefully placed. the The best type of mat It is made of thick wool. Mats) should be placed next to the shoulders so that the head is outside the mat.
Make sure your buttocks are at the same level as your shoulders to avoid arching your back too much. Beginners should rise with their knees bent towards the forehead, support the back with their hands, and do not raise the legs until the back is straight and stability has been gained. Middle school students may come with straight legs, provided there is enough abdominal strength to prevent the lower back from arching.
These movements should be done while exhaling. Try not to make your elbows wider than your shoulders. A wide belt can be placed around the arms just above the elbows to help keep the elbows together. Remember that the chest should be facing the chin, not the other way around. The throat should remain negative and the breathing should be relaxed. The curve in the neck should be as natural as possible, perhaps facilitated by placing a small rolled towel under the neck if the curve tends to flatten too much. The hands should be as close to the shoulder blades as possible, and then the fingers can be raised up or the fingers should be directed toward the spine. The last position helps lift the spine more efficiently. The body, from the central axis of the shoulder joints to the ankle joints, should be in a straight line. The feet are kept evenly extended and the legs are together. The pose can be maintained from 1 to 15 minutes, depending on ability.
To come out of the pose, the beginner can bring his knees up to his front, place his hands, palms down, on the floor, and slowly roll over. The head should be kept on the floor, the lower back down, and the legs lowered. Intermediate students do the same with straight legs. Make sure to exhale as you move. After the pose, lie down for a few moments and observe the effects of the pose, then turn onto your side and rise slowly.
Frequently asked questions about the shoulder holder
Q: Should I do shoulder stands during pregnancy or menstruation?
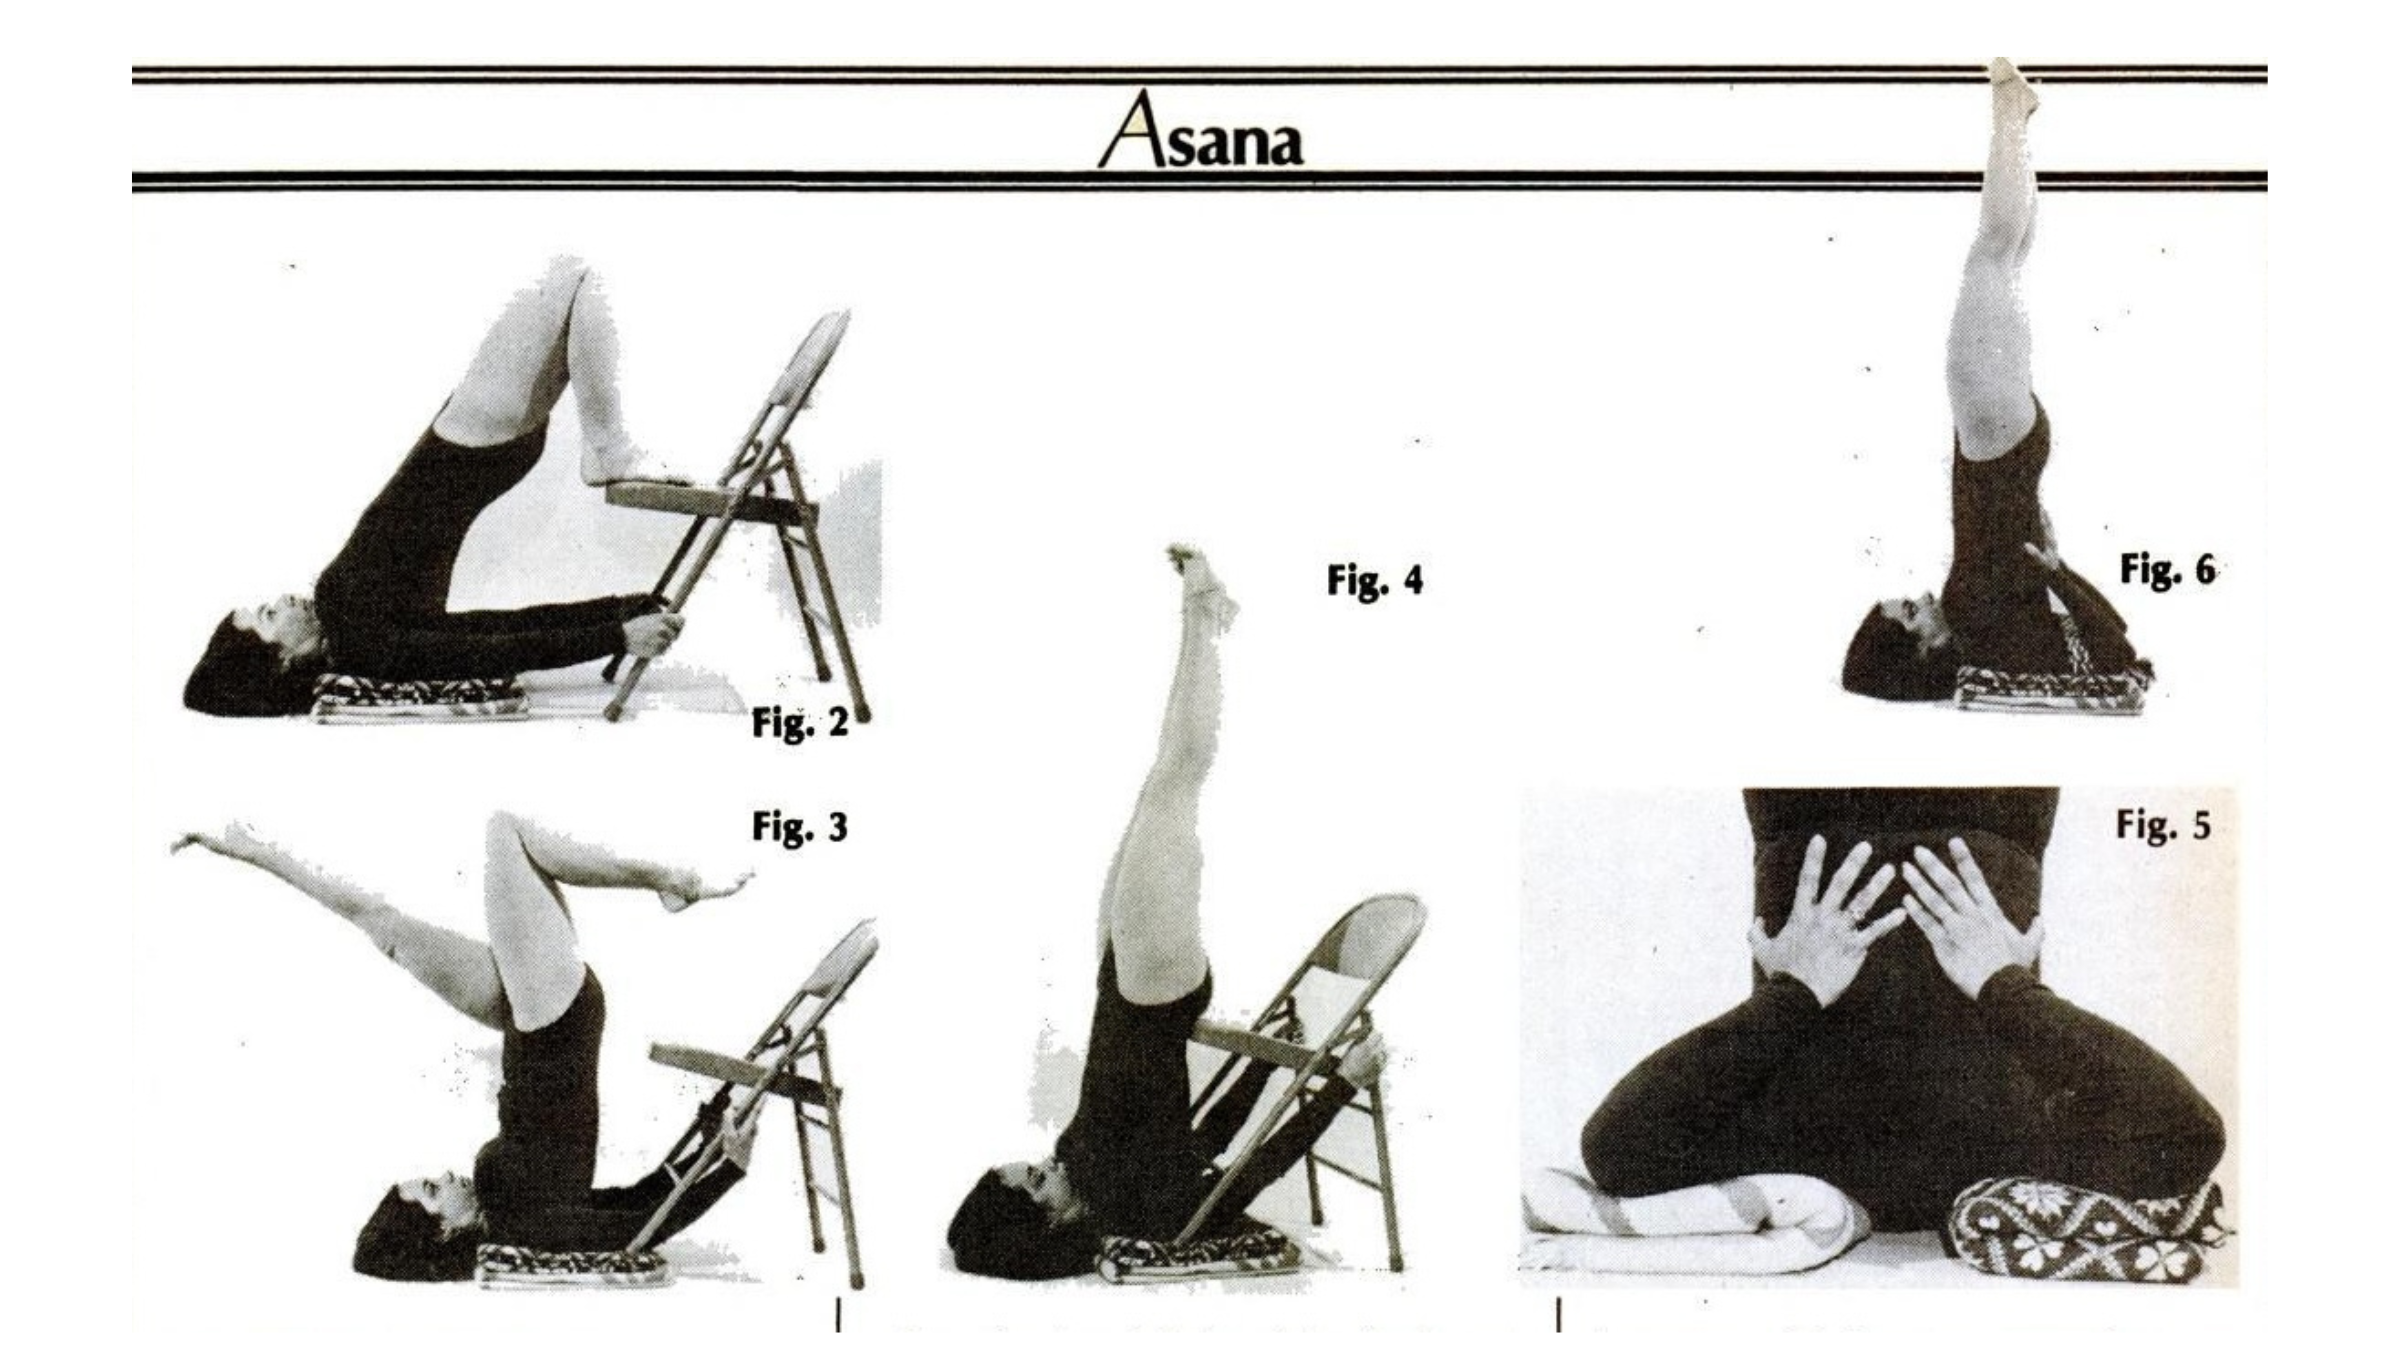
A: It is best to avoid shoulder standing during menstruation to prevent flow reversal. It is best to consult a health professional before doing shoulder exercises during pregnancy, although it is usually considered acceptable. There is a nice difference with the chair as shown in Figures 2, 3 and 4. It helps position the chair against the wall when pushing up.
Q: Why does my face turn bright red in the shoulder stand?
A: Redness indicates blood trapped in the head due to pressure on the jugular veins on either side of the neck. Elevate your shoulders using higher blankets or work in a chair as shown, placing more weight on the chair, thus freeing the throat and relieving pressure on the veins.
Q: How do I start doing the shoulder stand?
A: Start with properly placed blankets (see Figure 5). Using the wall, slowly push your feet toward it to lift the pelvis up. Clasp your hands behind your back and extend your arms toward the wall. Push your wrists down and turn your shoulders out. Hold for five to ten breaths, then release your hands, placing the palms on the mat. Then go down slowly while exhaling. Gradually, as the pose becomes more comfortable, try supporting your back with your hands and lifting your legs one by one to complete the pose.
Note to teachers
The most important part of a beautiful and healthy shoulder stand is the base. It must be remembered that the neck (the cervical vertebrae are the most sensitive mobile vertebrae in the spine and must be protected from bearing too much weight in the position. One way to prevent strain is to use two rolled blankets (or blocks covered with blankets) to provide support for the shoulders (see Figure 5). The blankets should reach the edge of the shoulders, and the neck should be in the groove between the blankets; therefore, the base of the neck does not bear any weight. This protects the lower part of the cervical spine and releases the throat.
There should be a little weight on the back of the head. The extra weight you feel here indicates that the blankets are not high enough. It is often helpful to place a yoga mat under blankets to prevent it from sliding on the floor and on top of it to help prevent elbows from sliding away. Figure 5 shows good placement for the blankets, but the elbows are too far back. Unless the elbows are in line with the shoulders, one cannot get the “push” down or the leverage to lift the spine upward. Figure 6 shows the use of a wide belt to bring the elbows closer together.
Before getting into the pose, it is recommended to place another blanket under the buttocks and thighs. Make sure it is the same height as the shoulder support. When the student lies down, his spine should be parallel to the floor. Without this underlining, the buttocks would be much lower than the upper body and cause too much curvature in the lower (lumbar) spine.
Using a folding chair can be helpful when a person is very tired, especially for a student with narrow shoulders and elbows that stick out a lot, or for a student who has to be slow to put any weight on their neck (e.g. someone recovering from an injury).
Figures 2, 3, and 4 show how one can first raise the chair, then lift the legs one at a time for balance, and then pull the chair back for proper support and lift. Exit, the procedure is reversed.