
Posted on April 15, 2026 at 01:46 pm
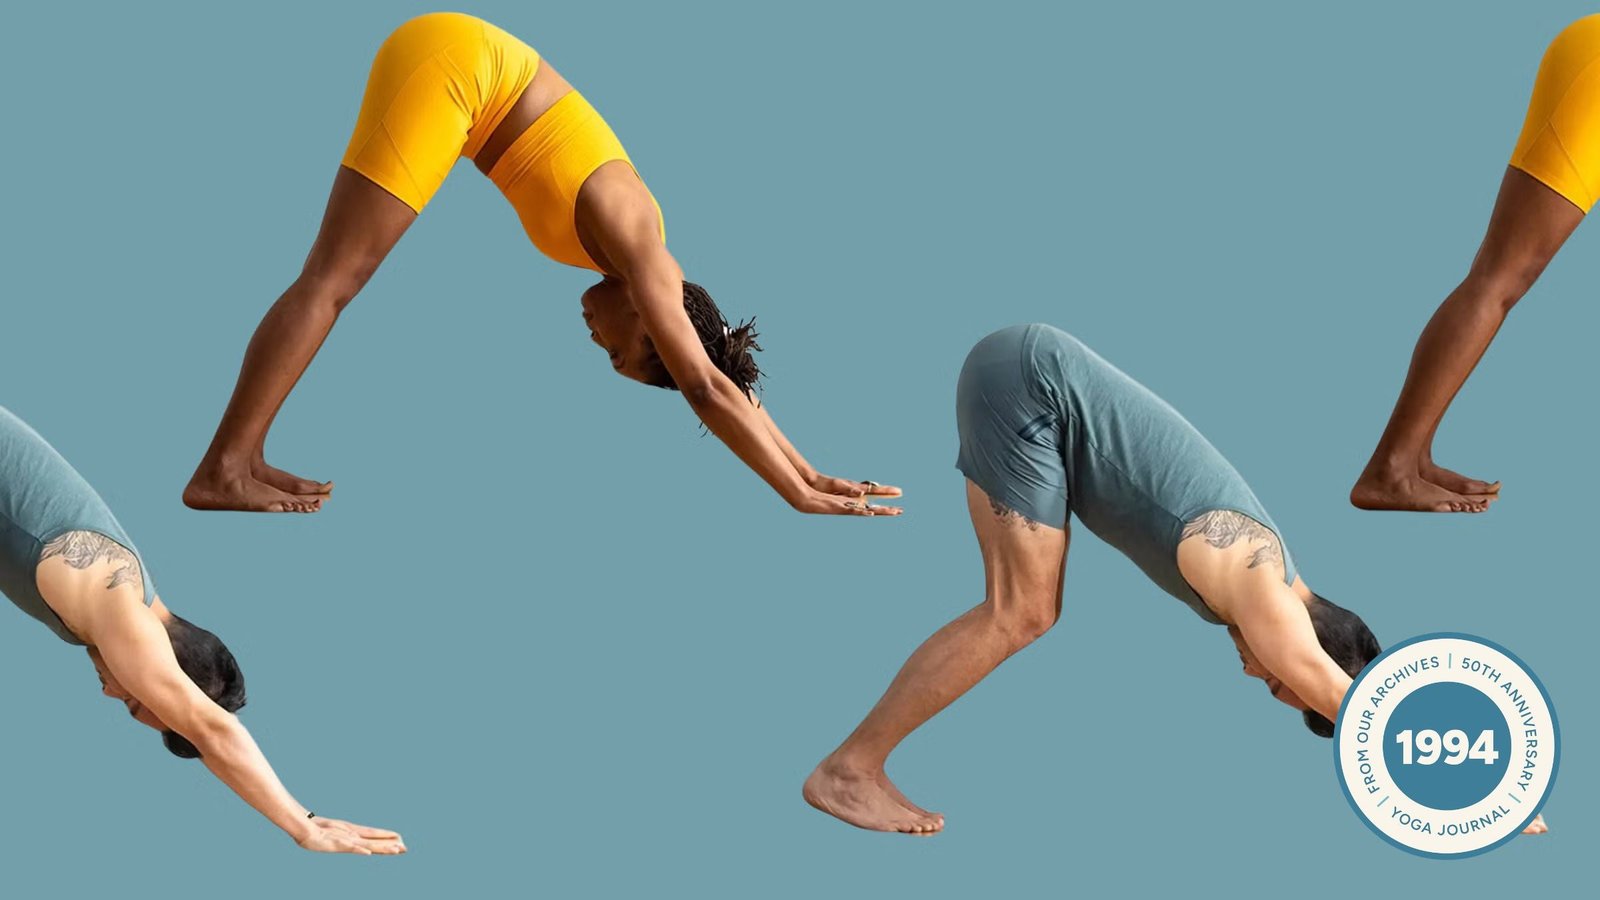
Yoga magazineQ archives The series is a curated collection of articles originally published in previous issues beginning in 1975. This article about Downward-Facing Dog first appeared in the January-February 1994 issue of Yoga magazine.
Downward facing dog position (Adho mukha svanasana) is an asana that no yoga student has ever surpassed. This pose combines the benefits of inversion, arm balance, forward bend, and restorative pose all rolled into one. It opens the shoulders, strengthens the arms, lengthens and frees the spine, stretches the back of the legs, tones the internal organs, and moves blood flow from the heart to the head. It can be used to energize or numb you, depending on whether you practice it actively or passively with support.
As with many basic poses, a thorough understanding of Downward Facing Dog is a building block for practicing more complex movements. Trying to build a movement vocabulary in your yoga practice without this pose would be like trying to form a sentence without the letter e. Interestingly, this asana corresponds to one of the fundamental building blocks in the evolution of human movement, which serves as a platform for success in later more advanced movement patterns.
One of the first movements a crawling infant makes is to push his torso back and forth using both arms and legs. This basic quadrupedal action, called “symmetrical locomotion,” is exemplified by the symmetrical movement of a jumping frog. The ability to push force through the body while standing on all fours underlies our ability to do so in more complex patterns while standing. For example, whether a runner is first across the finish line depends on how efficiently he sends force from the back to the front of the body with minimal deviation from the central axis.
The ability to push force through the body in a clear line allows us to move through space efficiently and effortlessly. In yoga, we use these same forces not for movement, but to facilitate the opening and movement of energy currents within the body. By organizing and adjusting our physical structure, we can conduct energy through soft tissues and soft organs in a sequential flow, as well as from bone to bone through joint spaces. This smooth flow of energy is the hallmark of what we commonly call “good alignment.”
In downward facing dog, the line of force runs from the center of the hands through the center of the elbows, through the center of the shoulders, across the front of the lumbar spine, and out through the sit bones. Any break along this line reduces one’s ability to move force efficiently.
Let’s look more closely at some common methods students use to break this power line in Downward Facing Dog. When you clarify your alignment, the pose will become lighter and longer, and no part of the body will feel fatigued.
Warm up for Downward Facing Dog
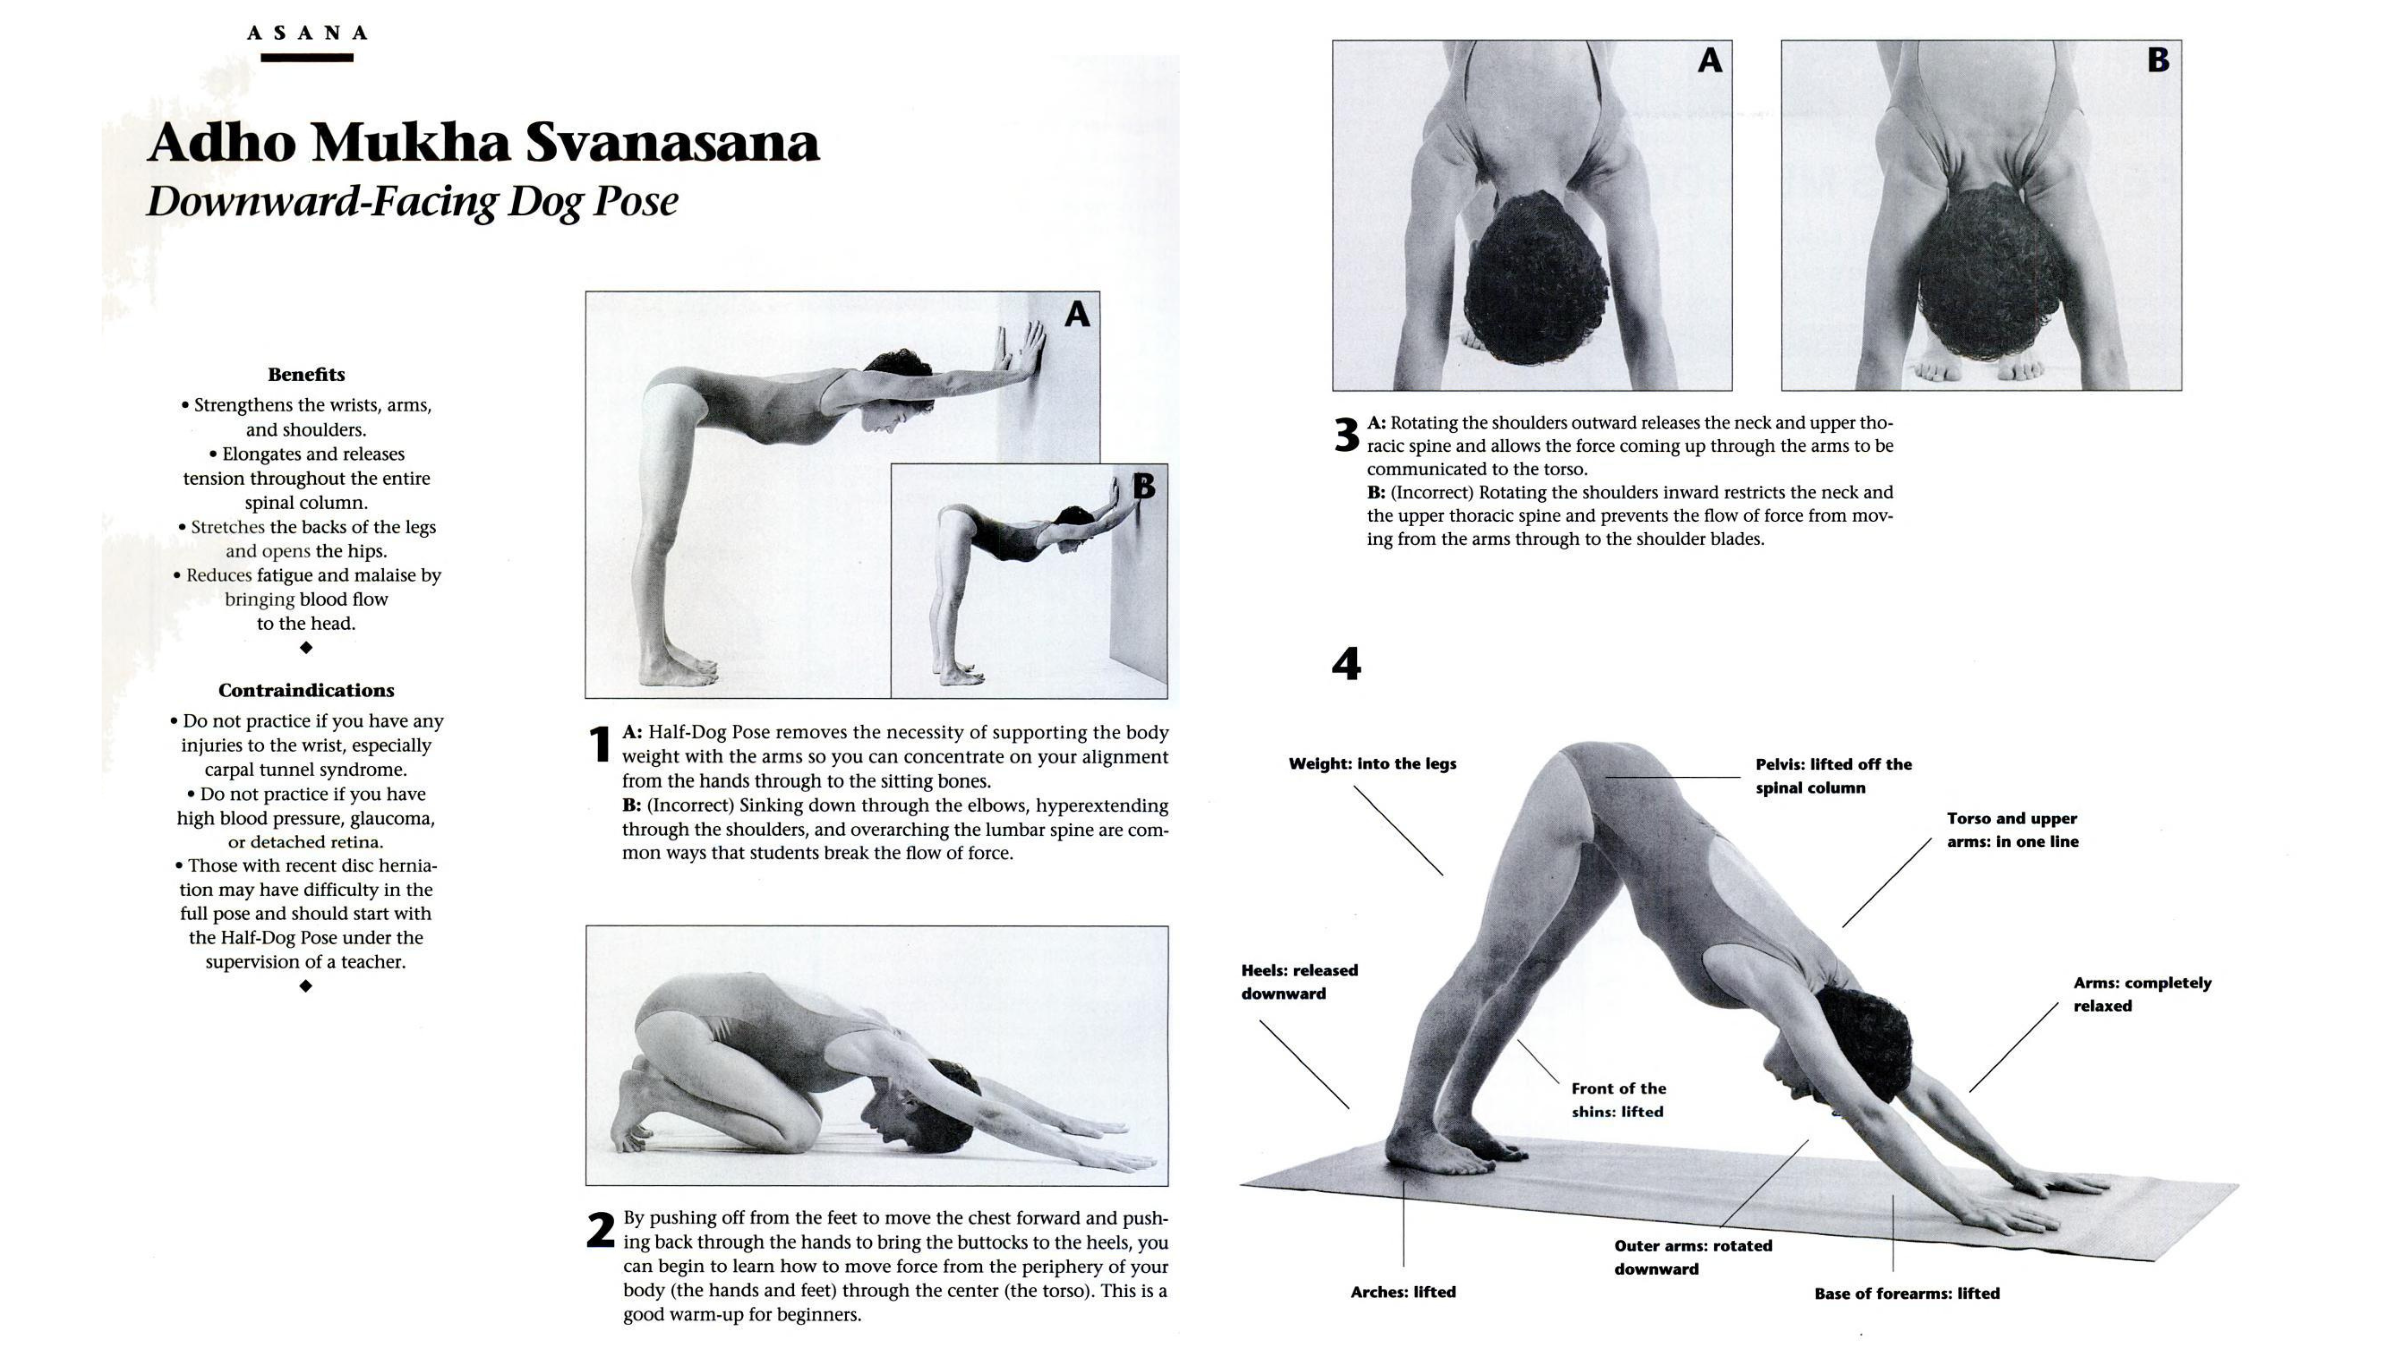
The common way to get into Downward Facing Dog is from the floor on all fours. However, if you are a beginner, carrying your entire body weight through the arms may be a way to go A bit of a shock. A simple variation called the Half Dog Pose (Figure 1A) eliminates some of that difficulty, allowing you to focus on your alignment.
Place your hands about shoulder width apart on the wall. Spread your hands wide with toes pointing up, then step your feet back until your torso is parallel to the floor. Make sure the feet are directly under the hips with the legs perpendicular to the floor and feet hip-width apart. Inhale, press away from the wall with your hands, and as you exhale, begin to reach back through your sit bones. With each inhale, see how far you can press your hands against the wall. With each exhale, lengthen the torso along a clear horizontal line.
To test your alignment, have a friend or teacher stand behind you and quickly apply pressure (light push) to your sitting bones. If there are no breaks in your alignment, all you and your helper will feel is the force coming into your hands. However, if there is a fracture, your assistant will see a “wobble” in that part of the body. If you don’t have someone to make this adjustment, hold the position for a minute or so and see where you tire first – this is often a good indicator of where the line of force is broken.
In a downward facing dog, the line of force usually breaks at the wrists and elbows. Instead of forming a horizontal line, the wrists and forearms hang down. This error is common among more flexible students (Figure 1b: incorrect). To correct this, actively raise your forearms toward the sky. As you are Click on the wall With your hands, resist the temptation to go down through your elbows.
Likewise, the center of the shoulder joint falling below the level of the hands results in a break in the line of force.
In this case, the front of the shoulder will hyperextend while the back shoulder muscles contract. More stringent students may have the opposite problem, where the shoulder falls above the line of the hands.
Both positions hinder the free flow of force from the arms to the torso. To correct their alignment, more flexible students should focus on lifting the shoulder blades higher than the rib cage. More stringent students should focus on lengthening the arm area until the shoulder joint begins to drop to the level of the arm bones.
Another common fracture in the line of force is in the spine. The spine has two basic curves – Thoracic (upper back) The sacral (base of the spine), which are convex – and two secondary curves – the cervical (neck) and lumbar (lower back), which are concave.
Any accentuation or reduction of these curves can alter the flow of force through the torso. (It is important to note that although the flow of force through the body should be straight, the outlines of the body will be curved, with gradual transitions between each curve. Therefore, looking at the outlines of the body can sometimes be deceiving.)
If you find that the “sway” is in your lumbar spine, place your hand on the small of your back and feel if the vertebrae are protruding or sinking away from the skin. If your lower back is rounded, try bending your knees slightly and rolling your sit bones up until you feel the vertebrae move inward. You can raise your hands up the wall to make it easier to bring your spine into a standing position. Neutral position. If you tend to overshoot your lumbar spine, adjust this by lifting the base of your rib cage up and slightly turning your sit bones toward your heels.
After a few more moments, step one leg forward and exit the pose.
How to train a downward facing dog
Getting into Downward Facing Dog is the same challenge you faced as a child when you pushed your hands into the floor to lift your chest off the floor.
By recapitulating some of these early movements, you can begin to learn how to push force through the body efficiently. Start on all fours with hands shoulder-width apart and knees slightly behind the hips. Start by pressing your hands back until your buttocks dip toward your heels. Let your back round as your head lowers toward the floor to open the shoulders (Figure 2).
Next, with your toes pointing down, push your feet back until your buttocks rise and your chest moves forward slightly past the hands. Allow the spine to gently indent and lift the head. Continue to rock back and forth, pushing force from the periphery (hands and feet) through the center (torso), gradually warming up your hips, spine, and shoulders. After about 10 passes, while pressing the hands back, lift the knees off the floor and reach the sit bones up and back, following the diagonal line of the arms.
At first, you may want to try bending your arms and legs simultaneously and then slowly straightening them over the course of two or three breaths.
Repeat this movement several times. This is a good way to work if you have it The whole body is very tightBecause the gentle oscillation between alternating flexion and extension of the limbs releases and activates the muscles in a way that does not “fix” the position. When you get down, allow yourself to rest Child’s position With your arms relaxed at your sides.
Add strength to your bottom dog
Even if you are a more advanced student, coming into Downward Facing Dog with bent arms and knees can be beneficial, because it is easier to feel flexibility and openness in the joints when the limbs are bent than when they are fully extended. Start in a comfortable, smooth position with your elbows and knees slightly bent.
Gradually begin to push force sequentially from the hands down to the tailbone so that the limbs straighten within a few cycles of breathing. Notice at what stage and in what part of the body you block the flow of force.
Such blockages are often indicated by a sensation of fatigue or tightness. Discover ways you can change your posture to relieve stress. Feel free to move into positions that do not resemble the classic form of the pose if these variations release blocked energy.
Working in this way allows you to create openness and strength for the final pose as you progress. This approach is very different from immediately getting into an incorrect position and then trying to adjust it toward a healthier form. In a slower, more conscious mode of action, the mind is actively engaged in each phase of the movement. By contrast, in the usual and more common way of working, we have no idea what happened between the start of the movement and the arrival of the final position. We may have no awareness of how we got into the Downward Facing Dog position with our shoulders hunched in, our wrists collapsing, or our jaws locked.
The most common obstacle for all levels of students occurs when the shoulders roll inward instead of outward (Figure 3b: incorrect). This problem is not surprising, considering that the structure of the pose requires the palms to face down while the shoulders roll—two opposing movements.
It is difficult to correct this error when the arms are already straight. Instead, bend your arms and begin making “scoop” movements with the elbows, turning the elbows up toward the sky and rolling the outer arms down.
Now, start pressing into your palms very, very slowly while allowing your inner elbows to point toward each other. When you begin to straighten your arms, be careful not to reduce the distance between the neck and the outer shoulder.
If the shoulders are released outward, the flesh will expand from the neck to the tips of the shoulders (Figure 3A: right). At first, you will likely swing on the outer edges of the hand to achieve rotation. You can correct this tendency by pressing down on the base of your thumb and index finger.
As you begin to push more and more force through the arms to lengthen the spine and return the weight to the heels, you may tend to pull the neck and head back into the spine like a turtle retreating into its shell. Use the exhale to help you release the breastbone away from the abdomen and drop the upper thoracic vertebrae down. Follow this by lengthening the neck and head in line with the rest of the spine (Figure 4).
As your torso begins to lengthen, focus on drawing the space between your pubic bone and tailbone upwards.
In more advanced students, continuing to extend the sitting bones upward after establishing the basic position often results in a collapse between the lumbar and sacral spine and inclusion of those vertebrae. Instead, consider moving the perineum away from the crown of the head, thus keeping the spine in a more neutral position and maintaining joint integrity.
Finally, make sure that the force moving through the joint spaces is not so strong that it disrupts the natural oscillatory movements of breathing while you remain in the pose. Stiffening the muscles by pushing too much force through the body will overwhelm the gentle current of breathing. Allow all joints in the body (especially throughout the spine) to open and move slightly with the inhale, and stabilize and release with the exhale.
When you open yourself to the wavering, dynamic movements of breathing, there is never any “final state,” but only a continuous, open process that allows life to move through you unimpeded. Having completed the task of bringing the body back into alignment, it is now time to surrender yourself to the force that moves through you.